How To Make Homemade Pizza With Trader Joe’s Pizza Dough
If you want to be able to throw together the absolute best homemade pizza, I’m going to show you how to do it with a single shopping trip to Trader Joe’s.
You can make a very simple pizza with pre-made pizza dough without following a recipe. But if you’re here, it means you want to make the best pizza possible, so I’m here to walk you through every step of the process for my preferred method.
This recipe is in no way sponsored by Trader Joe’s, although I’ll keep my inbox open for them. This is my own go-to recipe for homemade pizza that I love because Trader Joe’s ingredients are all top-notch quality.
You might think that using store-bought pizza dough wouldn’t be as fulfilling as making your own pizza dough, but I’m here to prove you wrong. Trader Joe’s pizza dough is some of the best I’ve had!
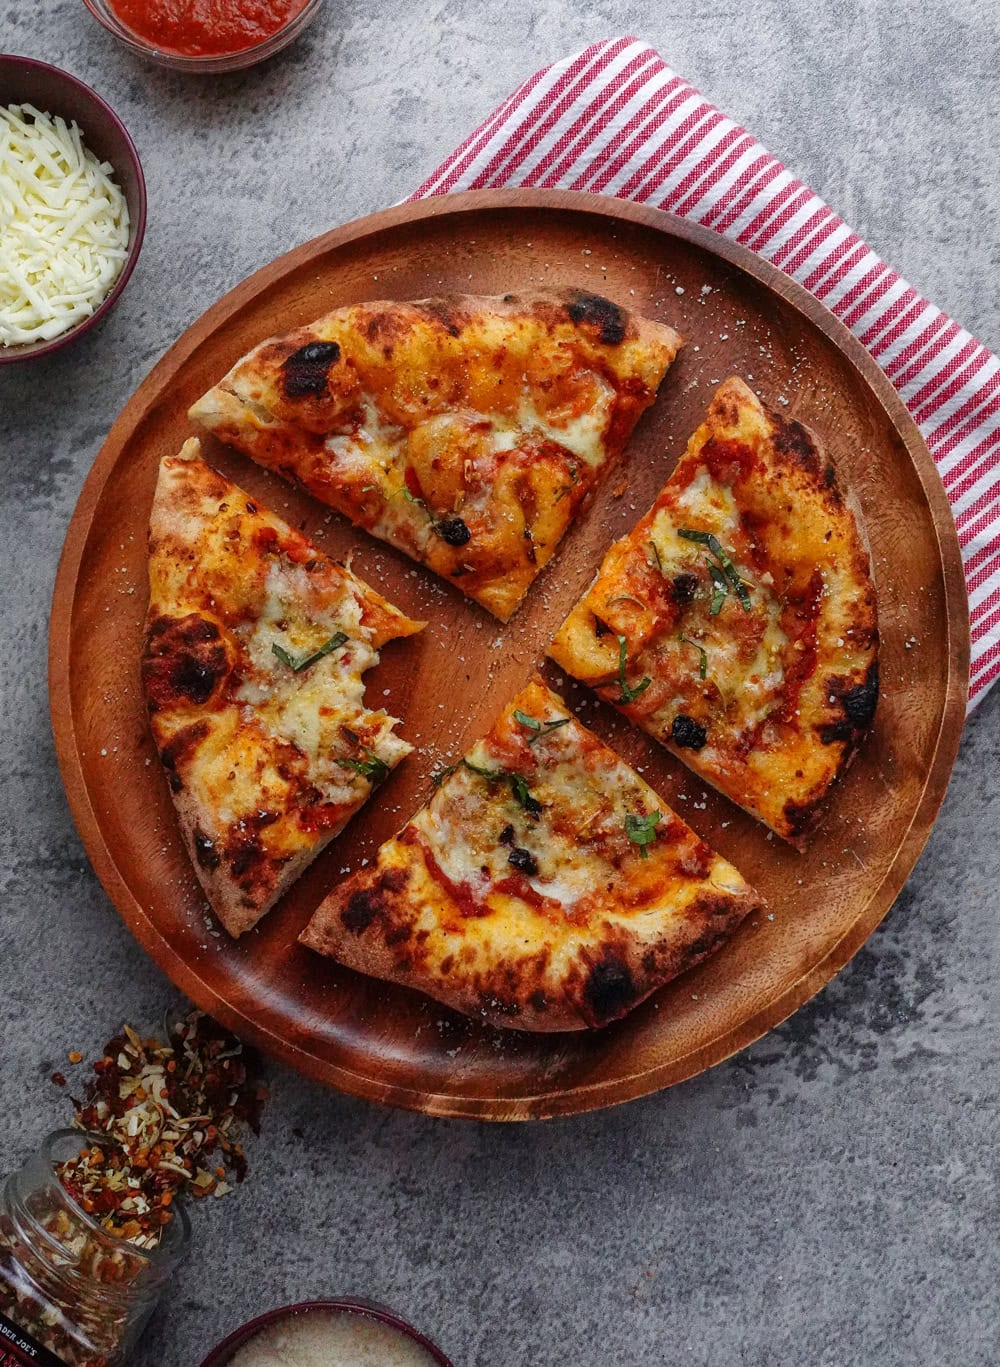
By using a single Trader Joe’s Pizza Dough (for about $2) we’re going to make two delicious 10″ pizzas!
If you’re scanning this recipe and thinking “this seems like way too much writing for a simple pizza recipe,” maybe you’re right. Making pizza can be a very simple process, but I didn’t want to leave anything to chance here.
I have been making pizza with Trader Joe’s pizza dough for years now, and I like to think I have perfected it. I wanted to include as much detail as possible to help you make the best pizzas of your life.
To help you out, I’ve included a table of contents below so you can jump around to each section of the recipe as needed.
This walkthrough is going to make two 10″ pizzas from one pizza dough, but I’ve more recently started using this same Trader Joe’s pizza dough to make Detroit Style Pizza as well. Check out that recipe if that’s more your style!
Why Not Follow the Trader Joe’s Pizza Dough Package Instructions?
The Trader Joe’s pizza dough contains preparation instructions right on the package, and they certainly work, but I’ve found that they aren’t ideal.
Here is what the package recommends:
“Leave dough at room temperature for 20 minutes. Remove dough from package. Flour work surface liberally and roll your dough into a 12″ diameter circle.”
If you follow these directions, you will end up with a delicious pizza. But here’s what I’ve found when following those instructions:
- Trader Joe’s pizza dough tends to get quite sticky. As the dough softens at room temperature, it only gets stickier within the plastic, making it very difficult to remove. If you are leaving it out for 20 minutes, I recommend transferring it to a separate container.
- 20 minutes is not long enough to allow the dough to become light and airy. As the dough sits at room temperature, the yeast becomes more active, so a longer time works much better if you want a fluffy crust.
- As a fan of thin-crust pizza, I find that making a single 12″ pizza from this Trader Joe’s pizza dough creates a pizza that is far too thick. If you prefer a thicker pizza, such as a Pizza Hut or Dominos pizza, then that can work fine. But I prefer a thinner crust, so I’m going to show you how to create two separate 10″ pizzas from a single Trader Joe’s pizza dough.
If you want to keep things simple, you can follow Trader Joe’s instructions. But then again, if you’re reading this recipe, you probably want to make the best pizza possible. So, allow me to show you how.
What Are The Best Ingredients for a Trader Joe’s Pizza?
Quality pizza dough is the star, but the toppings you choose for your pizza also matter.
For this pizza recipe, I love using the Garlic & Herb Trader Joe’s Pizza Dough. It is infused with a ton of amazing flavor, so I love using this particular pizza dough.
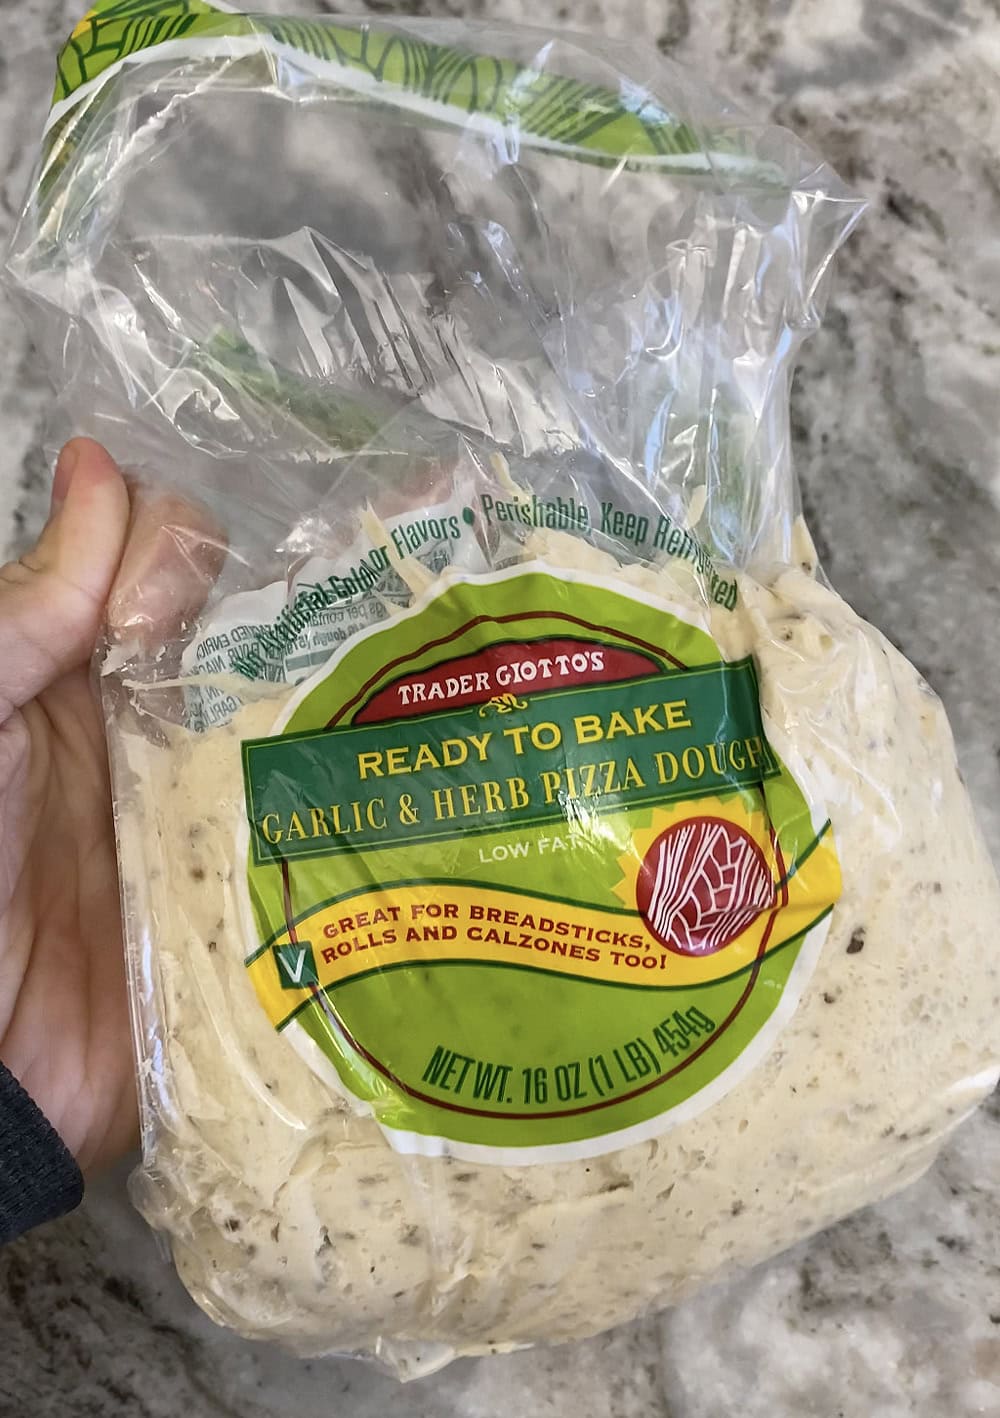
Trader Joe’s also sells plain pizza dough, which also works great. In fact, the two pizza doughs are virtually the same, but this version has an extra garlicky flavor that I really enjoy.
With all that being said, I use these pizza doughs interchangeably, so you may notice photos using one or the other. It’s just a matter of preference (and the availability of what Trader Joe’s has in stock that week).
Regardless of which type you choose, the main ingredients in Trader Joe’s pizza dough are simply enriched flour, water, oil, sugar, salt, and yeast.
Notice how the entire package is one pound, which is more than enough dough for 2 pizzas. If you’re worried about the pizza being too small when split into two, they come to almost the same exact size as a traditional Neapolitan Pizza. A 10″ pizza is the perfect sized meal in my eyes.
When it comes to toppings, you have the freedom to get as creative as you’d like, but this is what I tend to go with:

Trader Joe’s Bolognese Sauce is my preferred pizza sauce. While Trader Joe’s sells regular pizza sauce, their bolognese is one of my favorite products of theirs. It’s a thick meat sauce with a ton of flavor, and it really takes your pizza to the next level.
Trader Joe’s Lite Mozzarella has been my go-to cheese for quite some time. It’s the only lower-calorie cheese I’ve found that actually melts really, really well. Whenever you use low-fat cheese, not only does the flavor suffer, but it doesn’t melt nearly as well- that’s not the case with this cheese! If you’re not concerned about calories, opting for regular shredded mozzarella works even better.
Trader Joe’s Part Skim Ricotta is an excellent addition to the pizza. I often add a few dollops of this ricotta right on top of my pizza, and I love the extra flavor it provides. This is optional, and it can be left out if you prefer a more traditional pizza, but it’s a great addition.
Trader Joe’s Italian Style Soffritto Seasoning is my favorite way to season this pizza. You can go with any seasoning you’d like, but this Italian-style seasoning is the perfect compliment to the Trader Joe’s pizza dough.
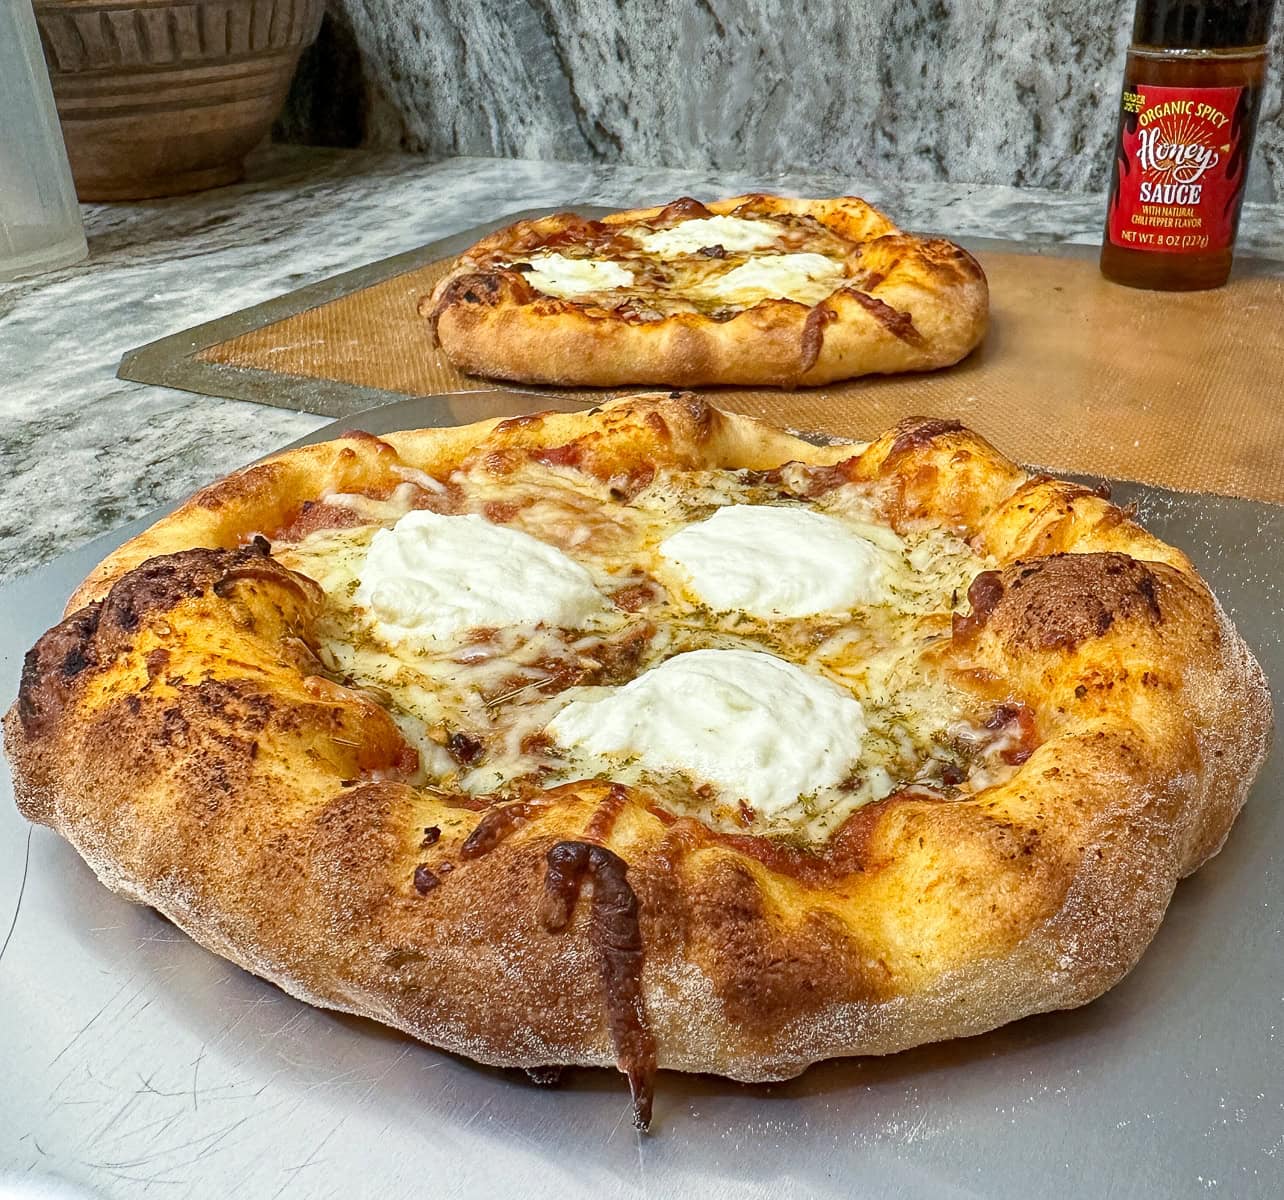
And last but certainly not least, Trader Joe’s honey sauce is a must for my pizza.
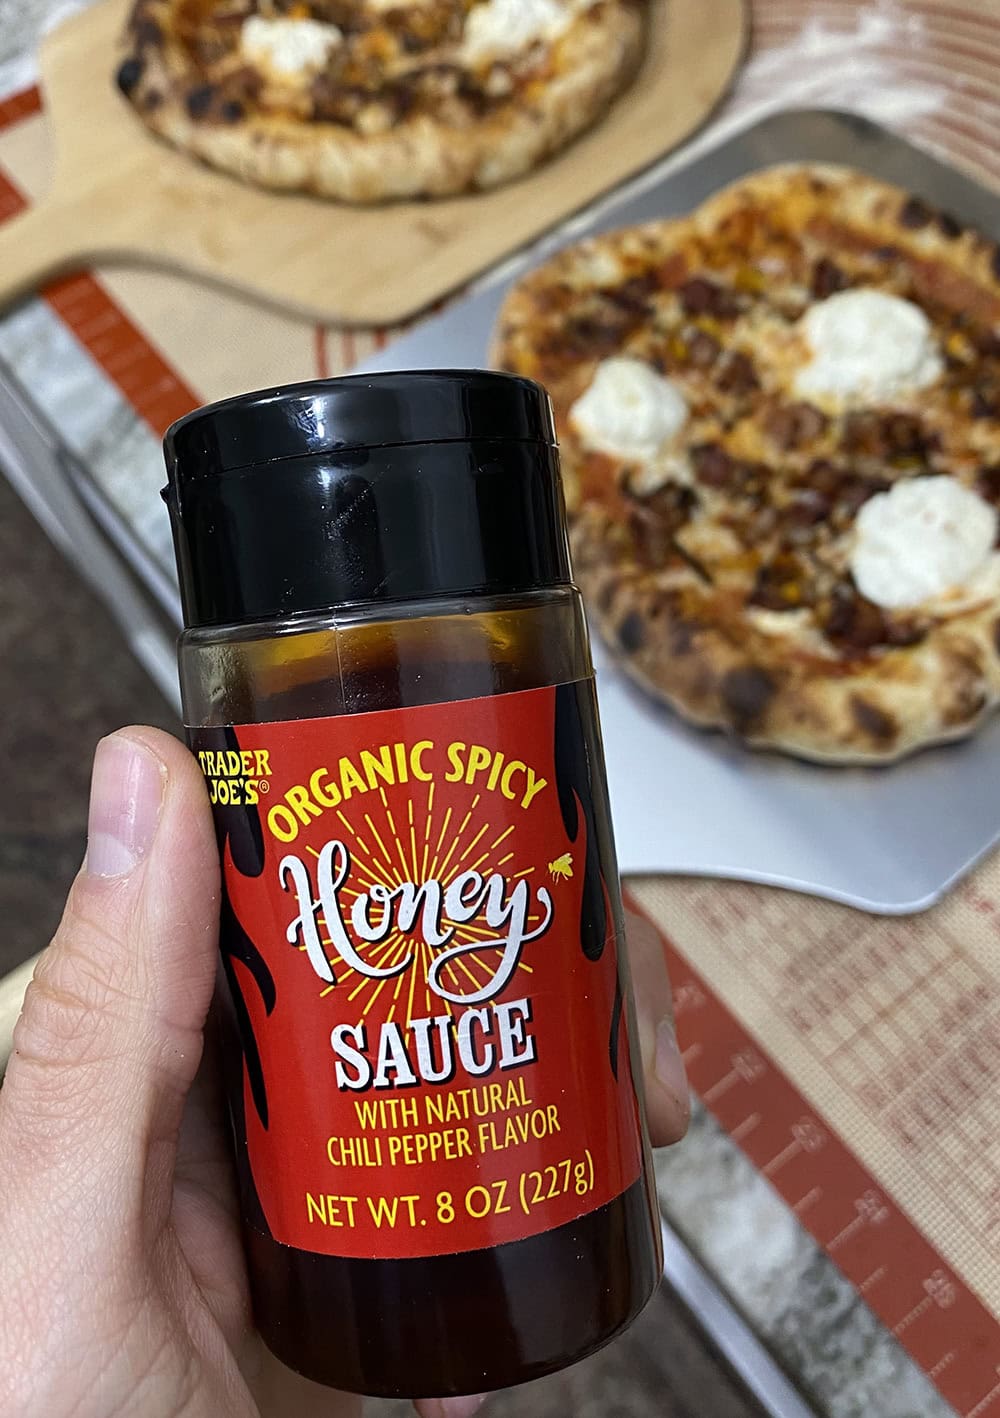
I was skeptical about drizzling spicy honey on top of my pizza, but it’s incredible.
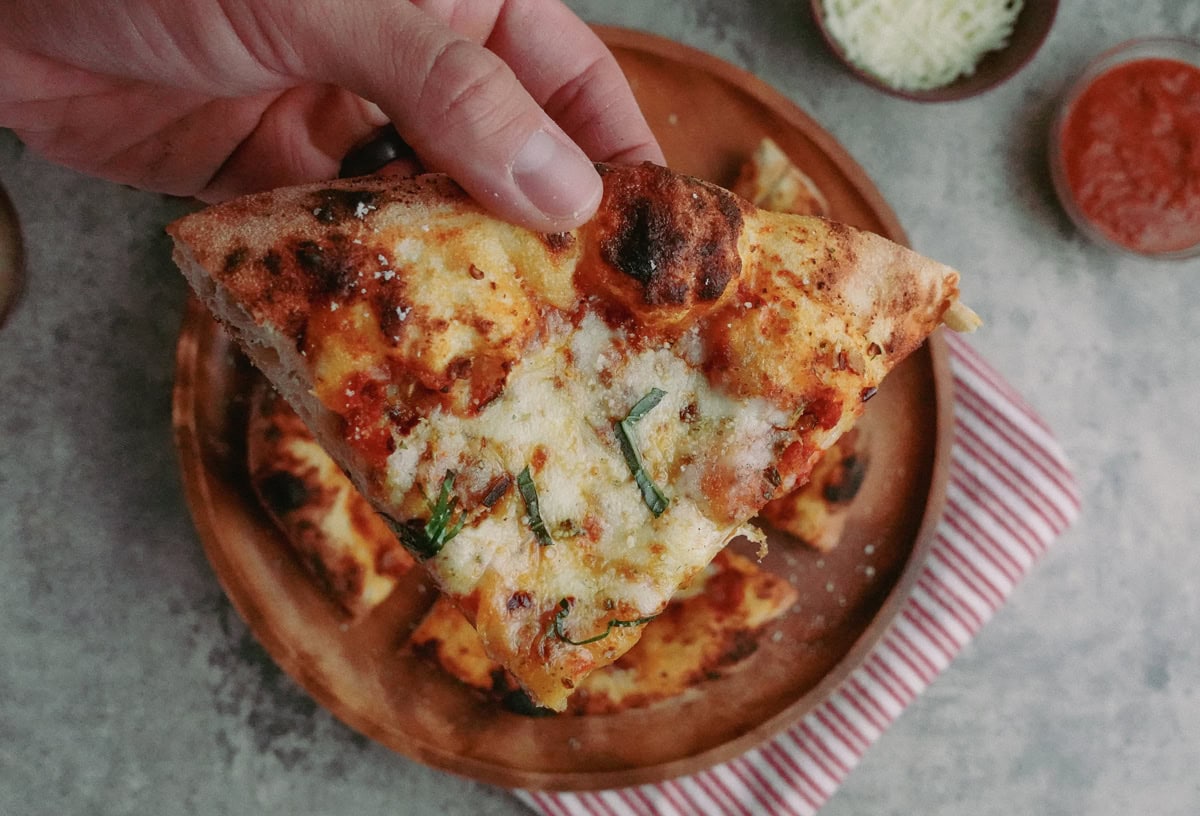
While the pizza is still hot, drizzle some Spicy Honey Sauce over the top, and you’ll quickly learn why the combination of hot honey and pizza is so popular. If nothing else, it’s a great way to flavor the crust you’re left with at the very end of your slice.
How to Prep Your Trader Joe’s Pizza
I make this exact recipe every single week. We like to celebrate “Pizza Friday” in our household, so if you follow these directions exactly as written, I promise that you’ll end up with absolutely perfect pizza every single time.
Ready to make your own pizza using Trader Joe’s pizza dough? Let’s get into it.
Step 1: Transfer the pizza dough to an airtight container with a small amount of olive oil.
I like to use a large glass Tupperware for my pizza dough. It’s going to poof up a bit, so choose a container that’s a bit larger than the pizza dough.
Drizzle a small amount of olive oil into the container (I don’t measure, but it’s never more than 1 tablespoon) and add your pizza dough right on top of the olive oil.
Flip the pizza dough a few times in the container to make sure it is fully coated in the olive oil, then cover and let sit at room temperature for 4 hours (minimum one hour, but four hours tends to work the best in my trials).
If you don’t want to wait, I’ve included instructions below for making pizza with zero wait time, although it’s less preferred.
Pro tip: If your house is cold, the dough will not rise as much. To ensure the pizza dough rises, I like to place the pizza dough in the oven with the pilot light on. The oven with the light on gives just enough heat to activate the yeast without cooking the dough.
The Trader Joe’s pizza dough instructions say to let it size for 20 minutes, but I don’t find that to be nearly long enough.
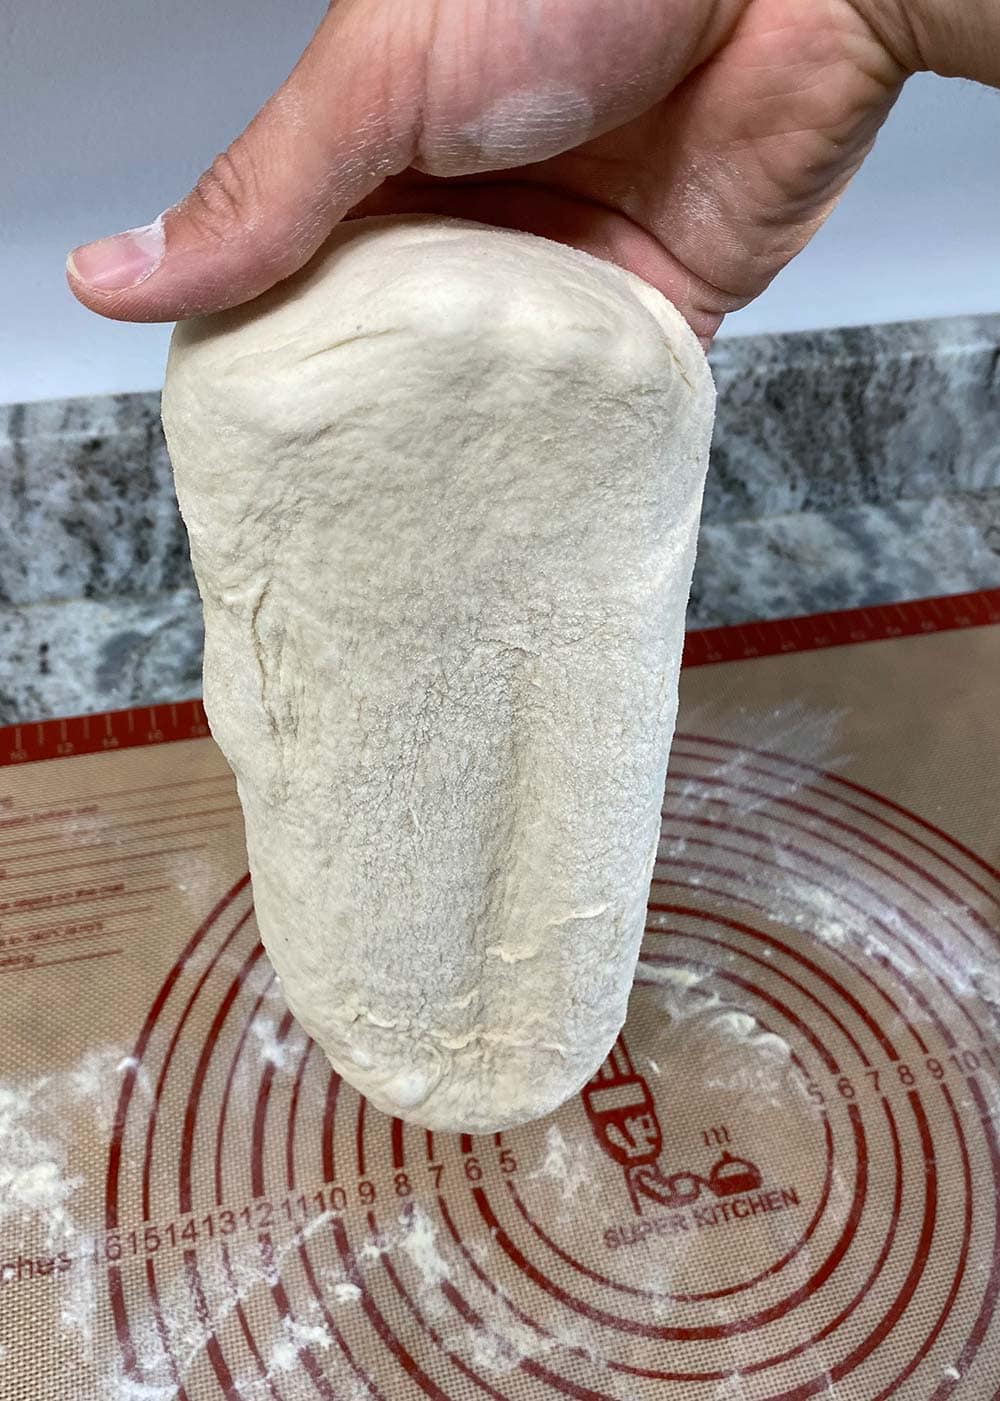
When you cover the pizza dough and let it sit at room temperature, the yeast will become very active, and the dough will double in size. See the below photo for the before & after…

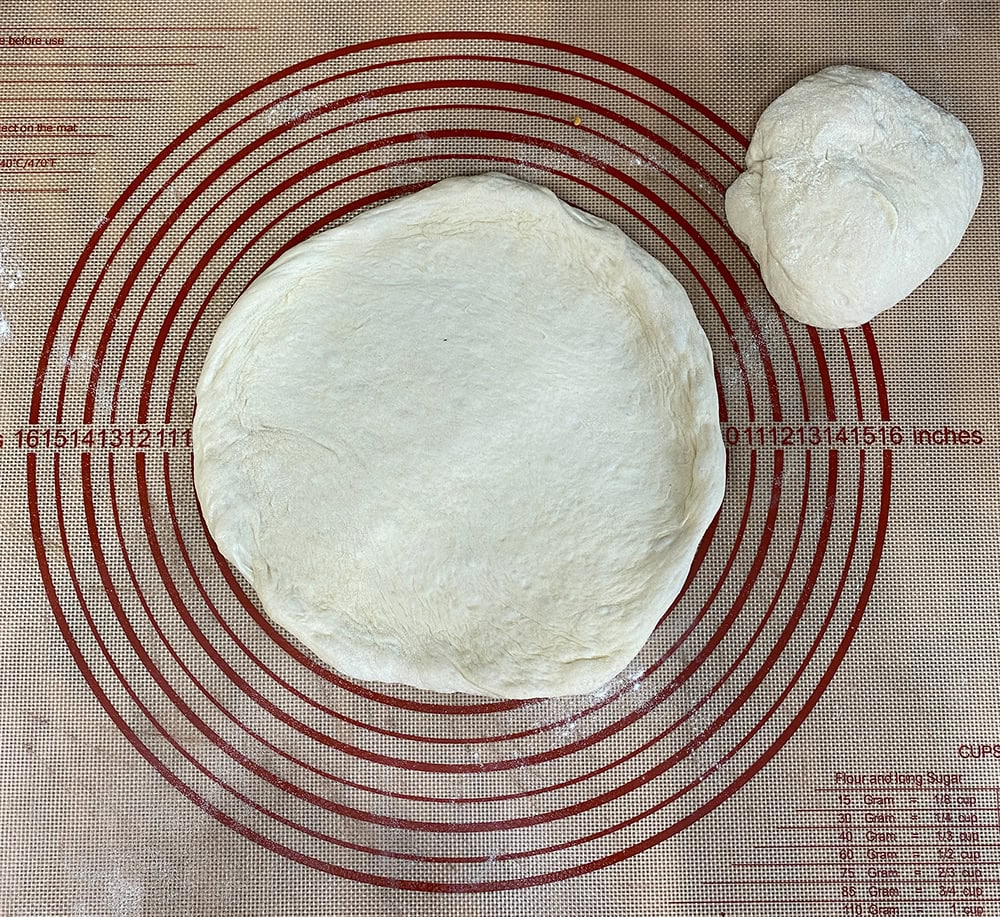
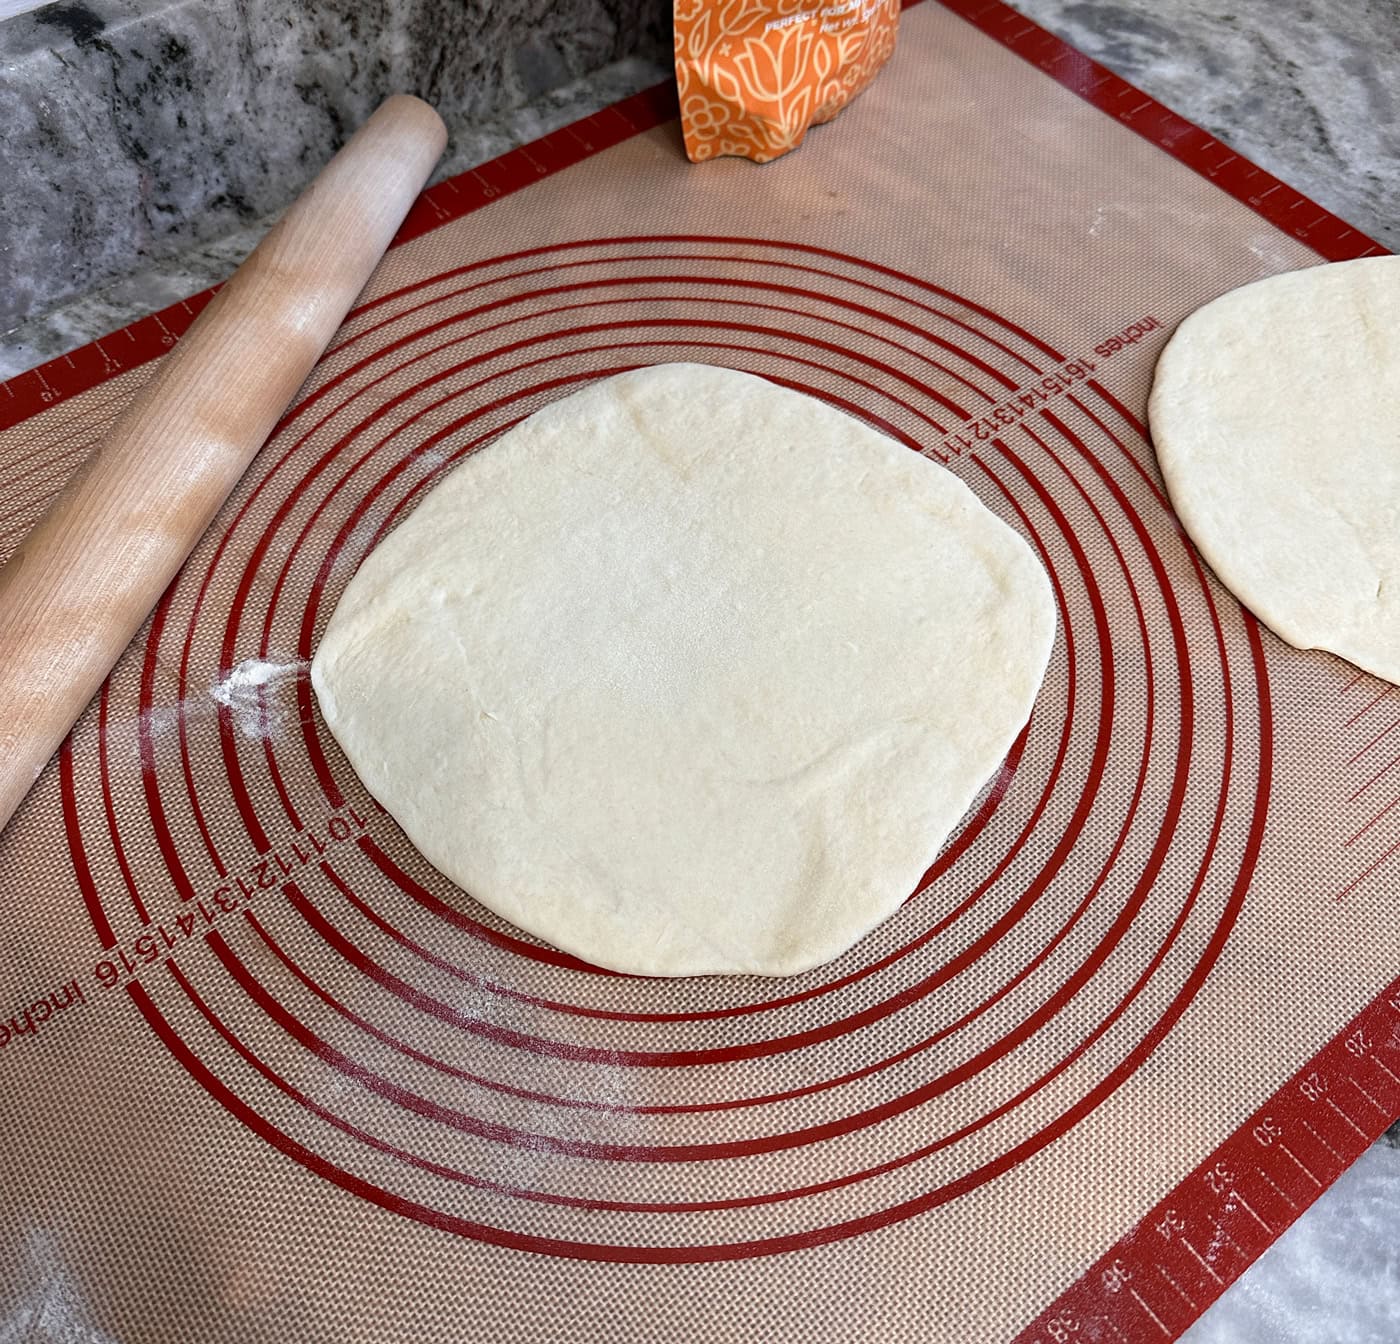
Step 2: Split the Pizza Dough Into 2 Equal-Sized Balls
After the dough has risen, you’ll split it into 2 separate pieces to make your 2 pizzas.
I like to weigh my pizza dough, then split it in half to get 2 perfectly equal-sized portions, but you can eyeball it. Once split, lightly knead each dough ball for about 30 seconds to smooth them out.
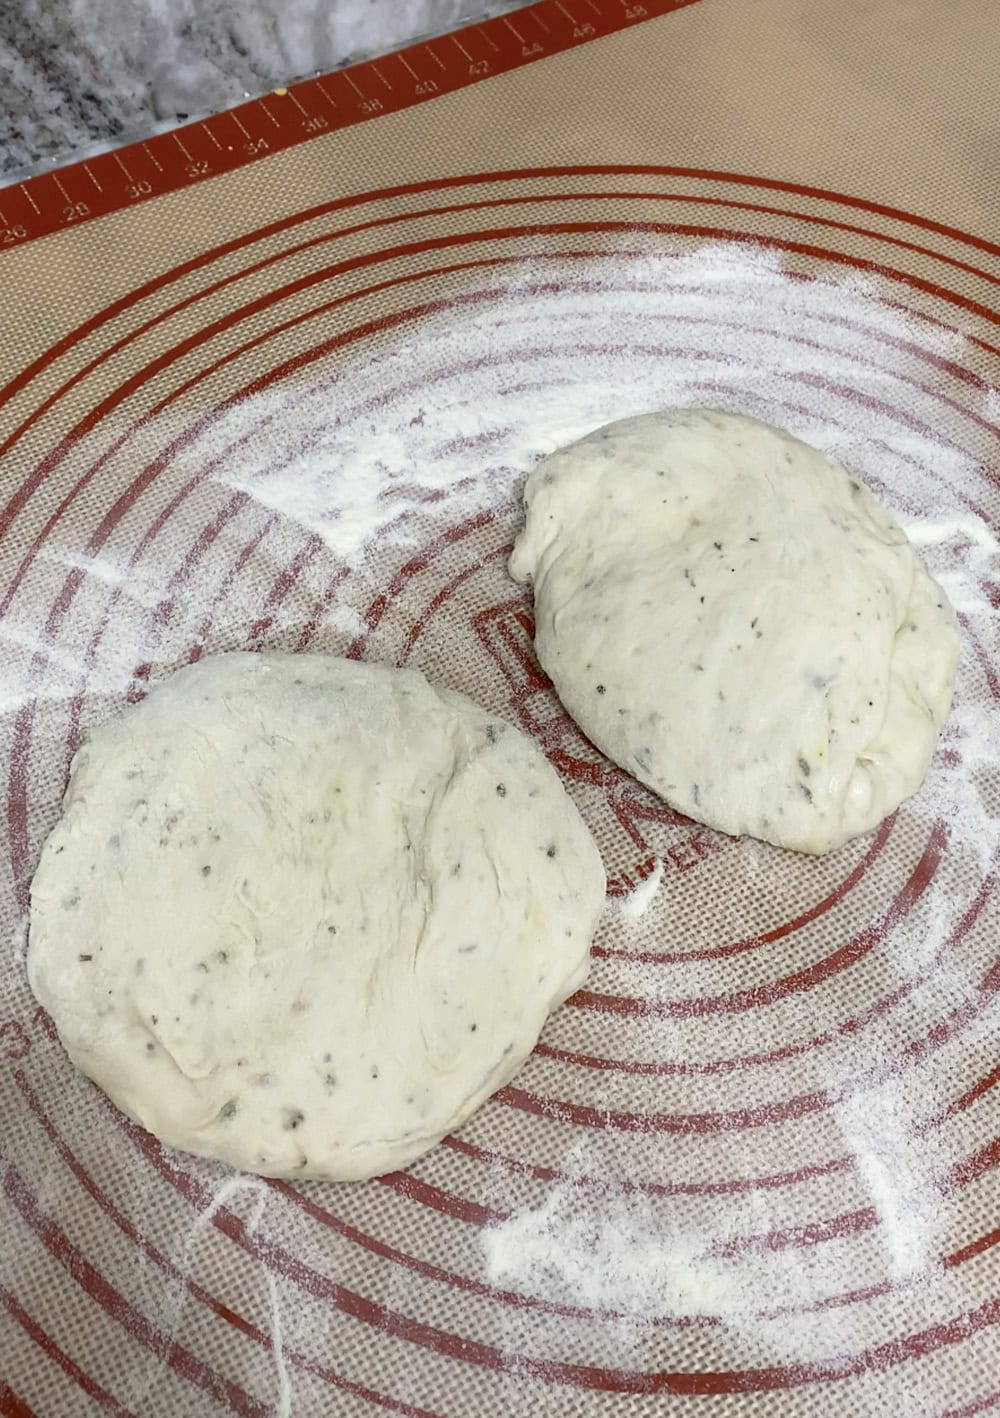
You don’t need to knead the dough balls very much- at this stage, we simply want to smooth them out and repair any parts of the dough we may have ripped in the process.
The dough will be pretty sticky, but if you use a silicone mat, it will be very easy to lightly knead. Otherwise, you can use a little bit of semolina flour to help.
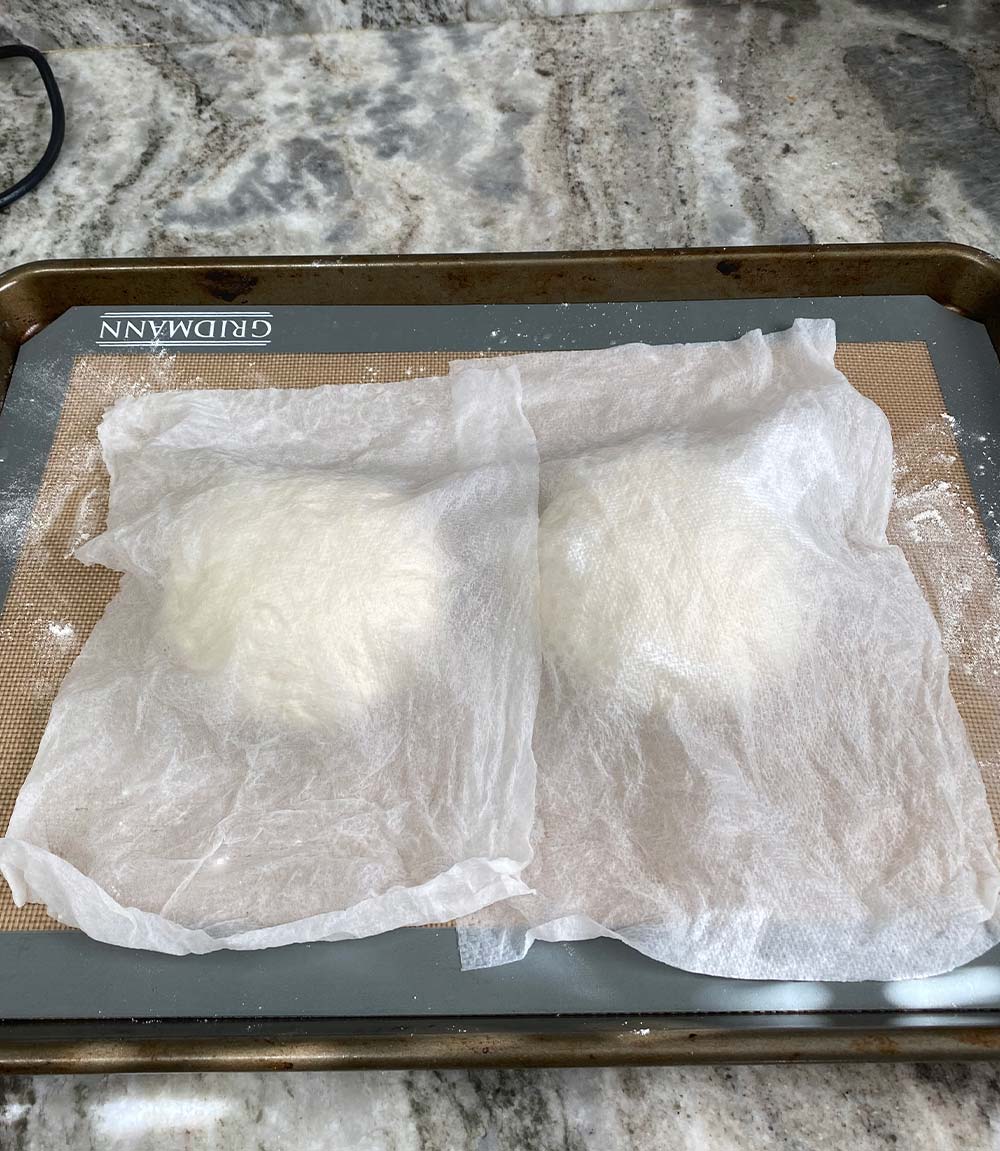
Step 2: Cover the Pizza Dough Balls for 30-60 Minutes
I like to cover the pizza dough balls with a wet washcloth or paper towel to lock in moisture while they sit, but placing them back in an airtight container has worked well for me too.
If you have to skip this step, you’ll still have a great pizza crust, but this final hour gives you one more quick rise for the fluffiest crust possible.
While the dough sits, it’s extremely important to preheat your oven.
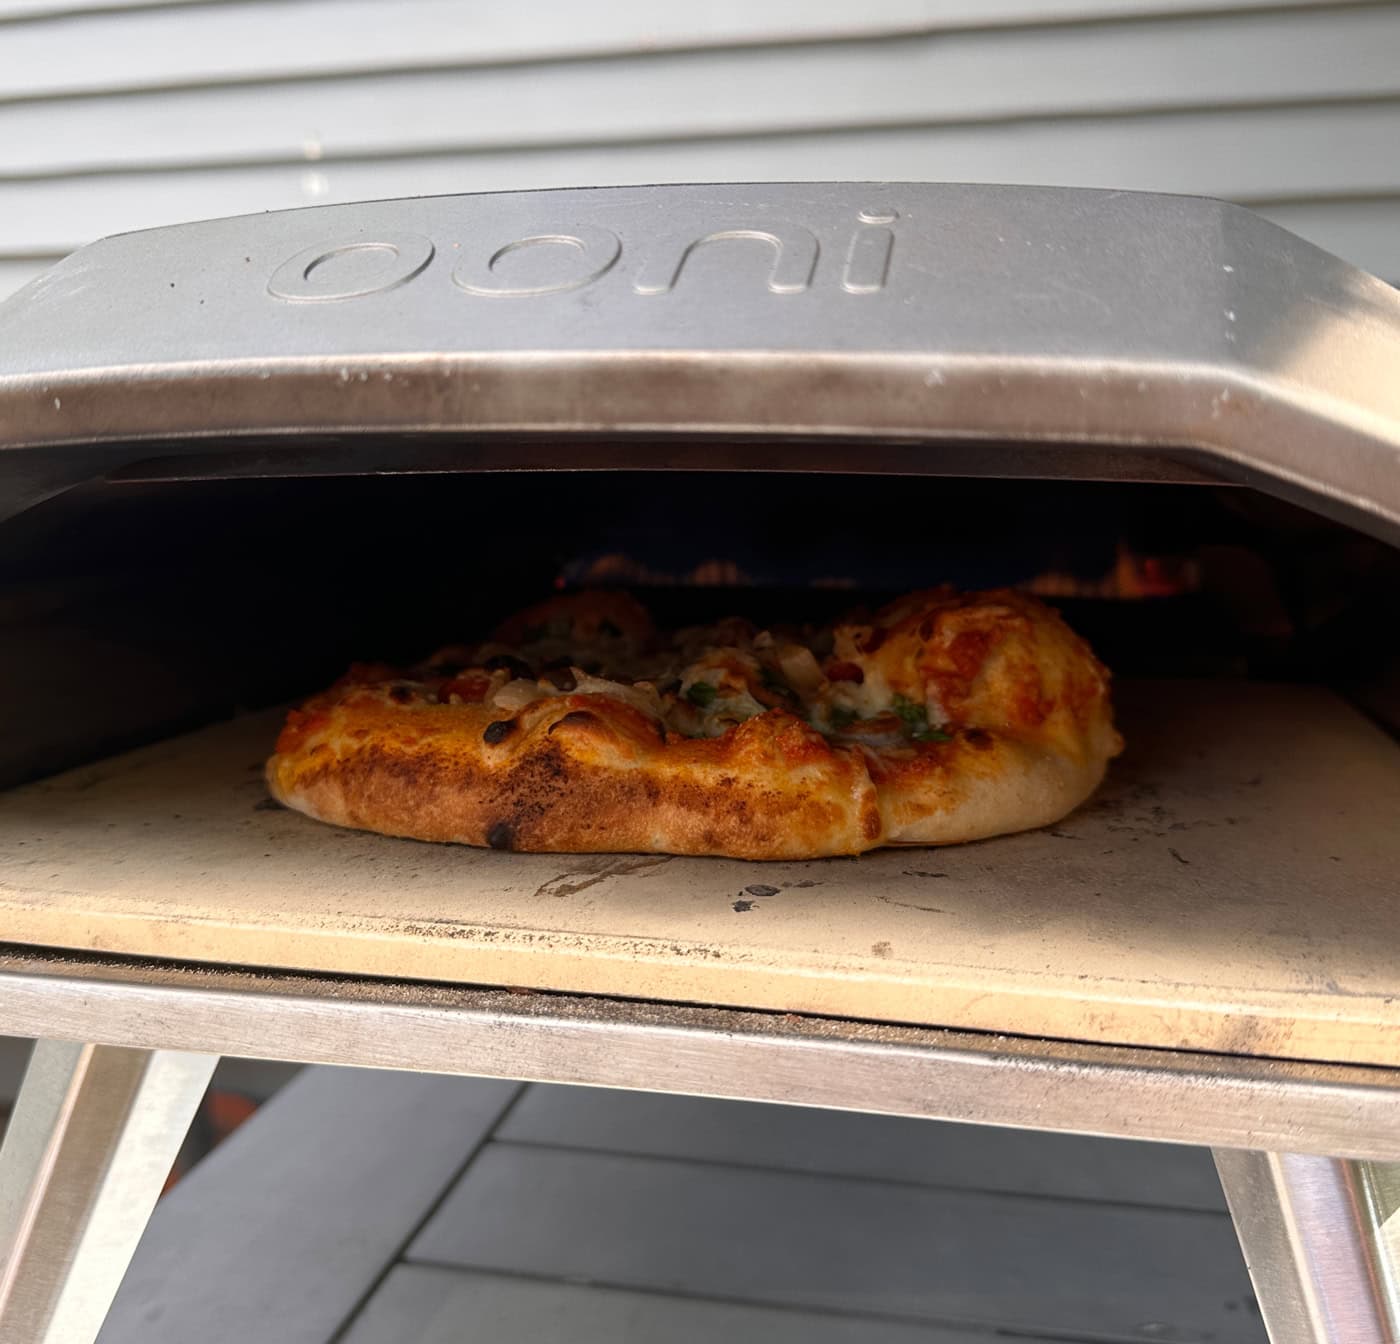
I use a pizza oven, and I highly recommend investing in one if you plan on having pizza nights often! I have the Ooni Koda 12, which hooks up to a propane tank outside to make things super easy. It’s 12″, so it’s on the smaller side, but it works perfectly for me considering I always make 10″ pizza.
It can reach 700-900 degrees F, which is far hotter than a standard oven, making it ideal for pizza and getting that beautiful char on the crust.
Ooni is definitely one of the better ovens out there, although there are other options as well, so I recommend checking that one out.
If you do not have a pizza oven and are using a regular oven, I highly recommend using a Pizza Steel. Pizza steels create a cooking surface for your pizza that gets insanely hot, allowing the pizza to cook very quickly. Without a pizza oven, using a pizza steel is the next best thing and will produce amazing results.
I like to crank the oven as high as possible (typically 500 degrees F) with the pizza steel or pizza stone in the oven for a full hour, allowing it to get really hot before cooking the pizza. The hotter the surface, the better!
Don’t worry, I have more specific cooking instructions below.
Step 3: Form Your 10″ Pizzas
There’s nothing I love more than an airy crust (it always feels like hitting the lottery when you get a nice big crust bubble) so we’re going to carefully form each pizza.
First and foremost, sprinkle some semolina flour or cornmeal on your surface and over each ball of dough. Finely ground semolina is the secret ingredient most pizzerias use, and it will help you tremendously when forming your Trader Joe’s pizzas.
Rather than using a rolling pin to roll the pizza out, start by pressing down in the center of the pizza dough, then working your way towards the outer crust. This method helps to keep all of the air inside of the outer crust, which is what we want.
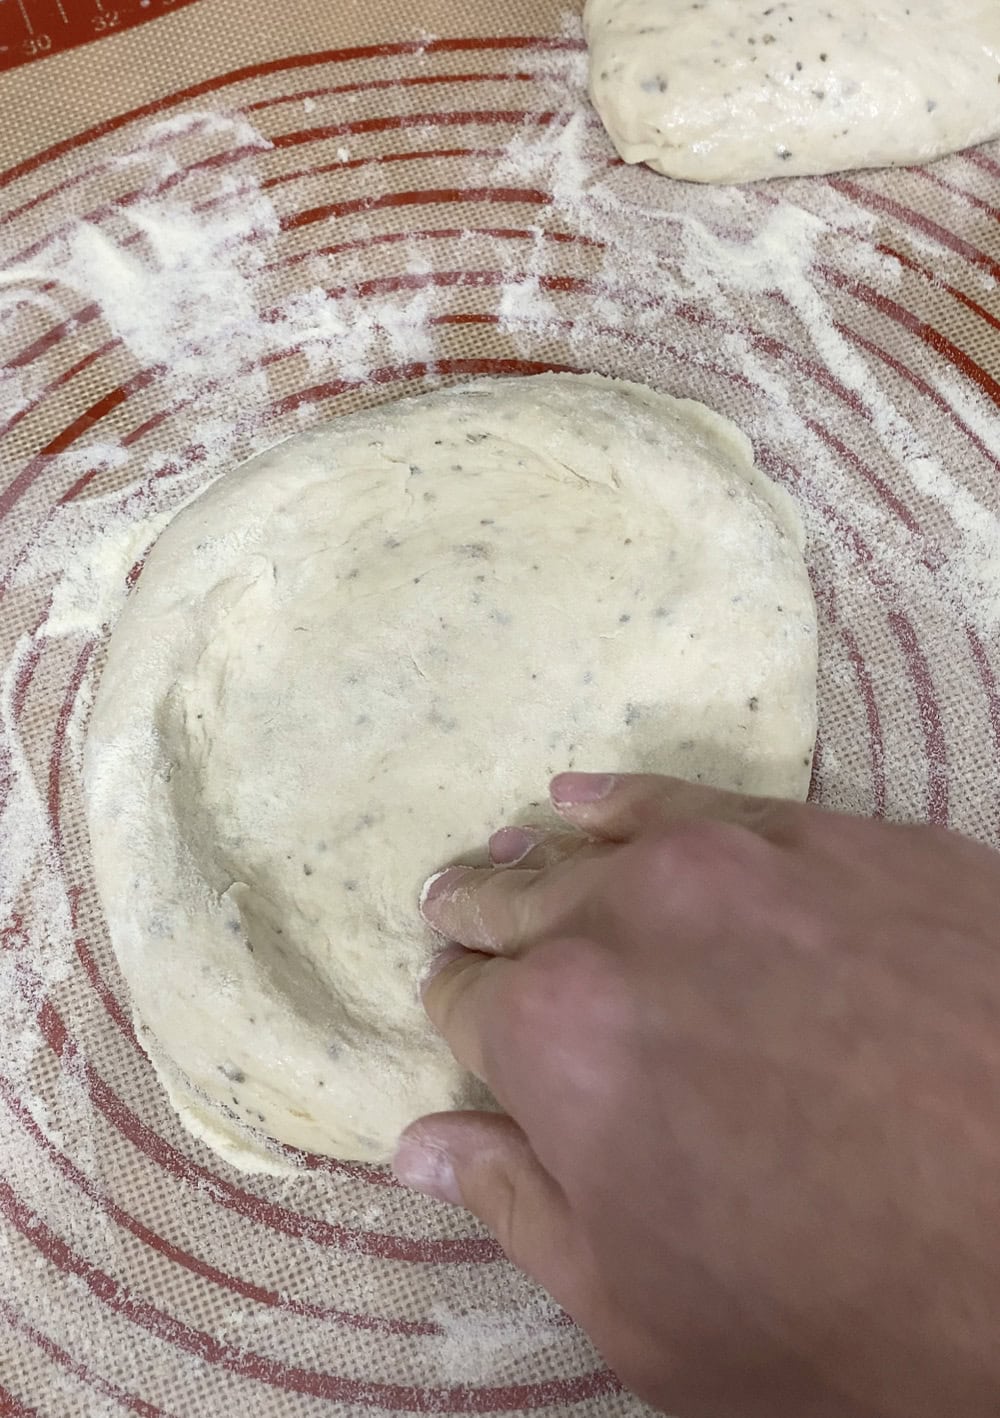
After you do this, you’ll pick up the pizza by hooking your fingers under the outer crust. You’ll slowly turn the pizza like a wheel, allowing gravity to stretch the pizza into shape.
Once stretched out, you should have a pizza that is right around 10 inches.
I form my pizza on this Silicone Pizza Mat that measures the pizza for you, which makes things very easy.
The exact size may vary, but I always aim to make my pizzas as close to 10″ as possible. If you don’t want as big of an outer crust on your pizza, you can stretch each pizza to 12″ with a smaller crust.
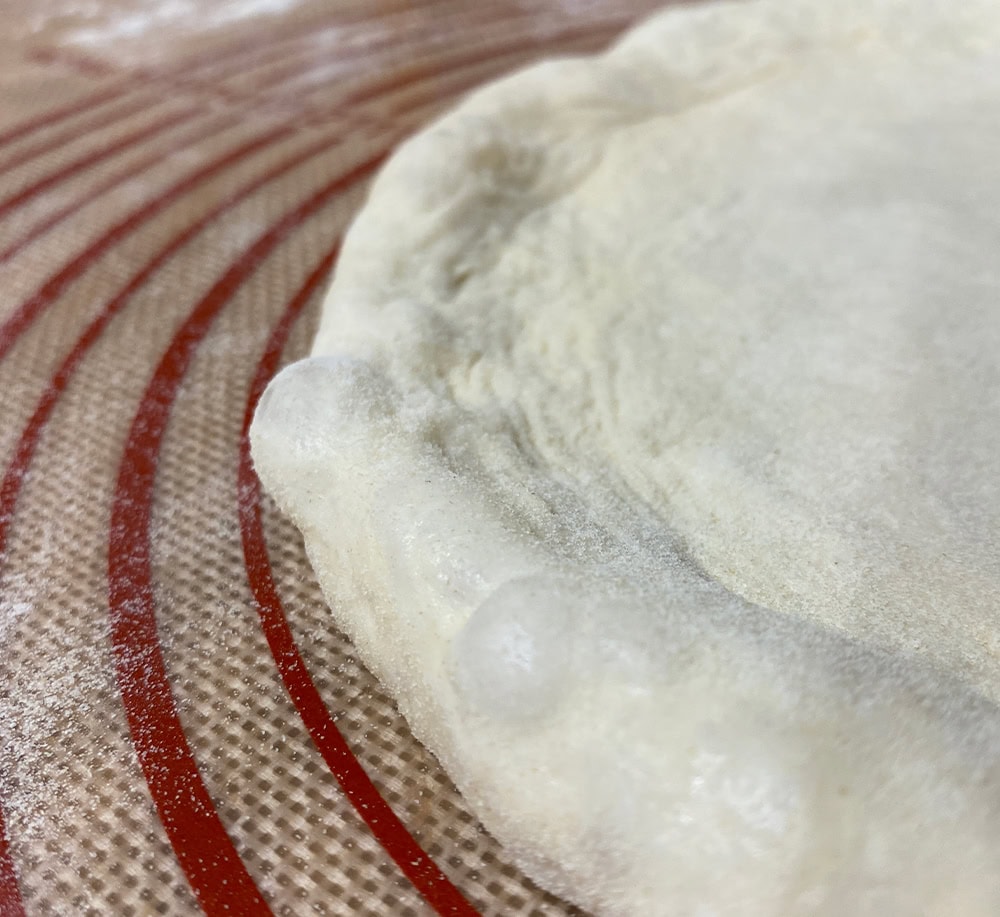
My goal is always to have some air bubbles in my crust like you see above, because that leads to those wonderfully charred bubbles that everybody loves.
The pizza is going to seem extremely thin, but there is enough rise when it cooks that it holds up just fine (even with toppings).
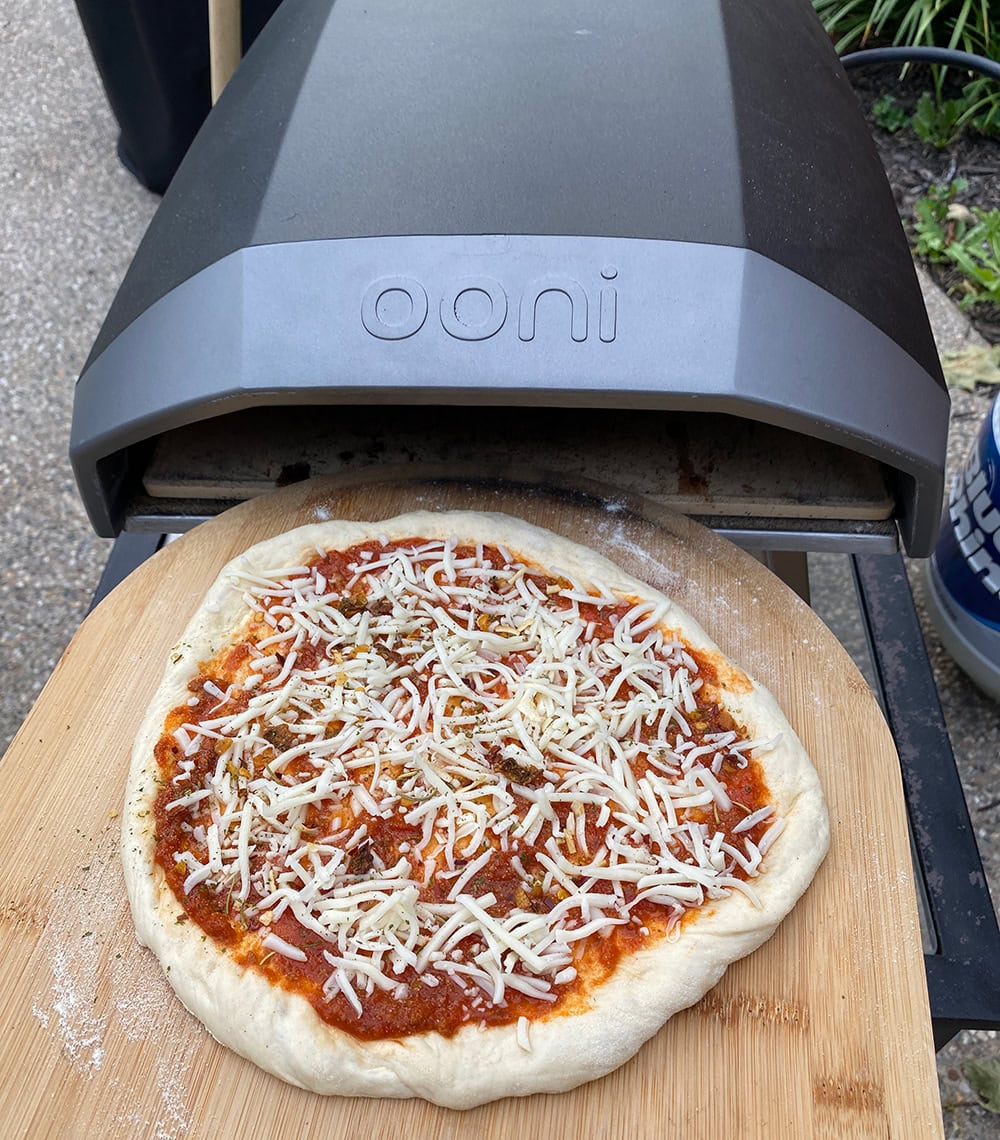
Step 4: Place Your Dough on a Pizza Peel and Add Toppings
Sprinkle some semolina flour or cornmeal on a wooden pizza peel (note that a wooden peel allows the pizza to slide off much easier than aluminum) and transfer your pizza dough onto the peel.
If you add the pizza dough to the pizza peel on its own, it will not slide off, so it’s important to use a dusting of semolina or cornmeal.
Once the formed pizza dough is on the pizza peel, give it a little shake to make sure the pizza moves around and will be able to easily slide off the pizza peel. If it doesn’t budge, lift the crust to sprinkle more semolina underneath until you’re able to slide it around.
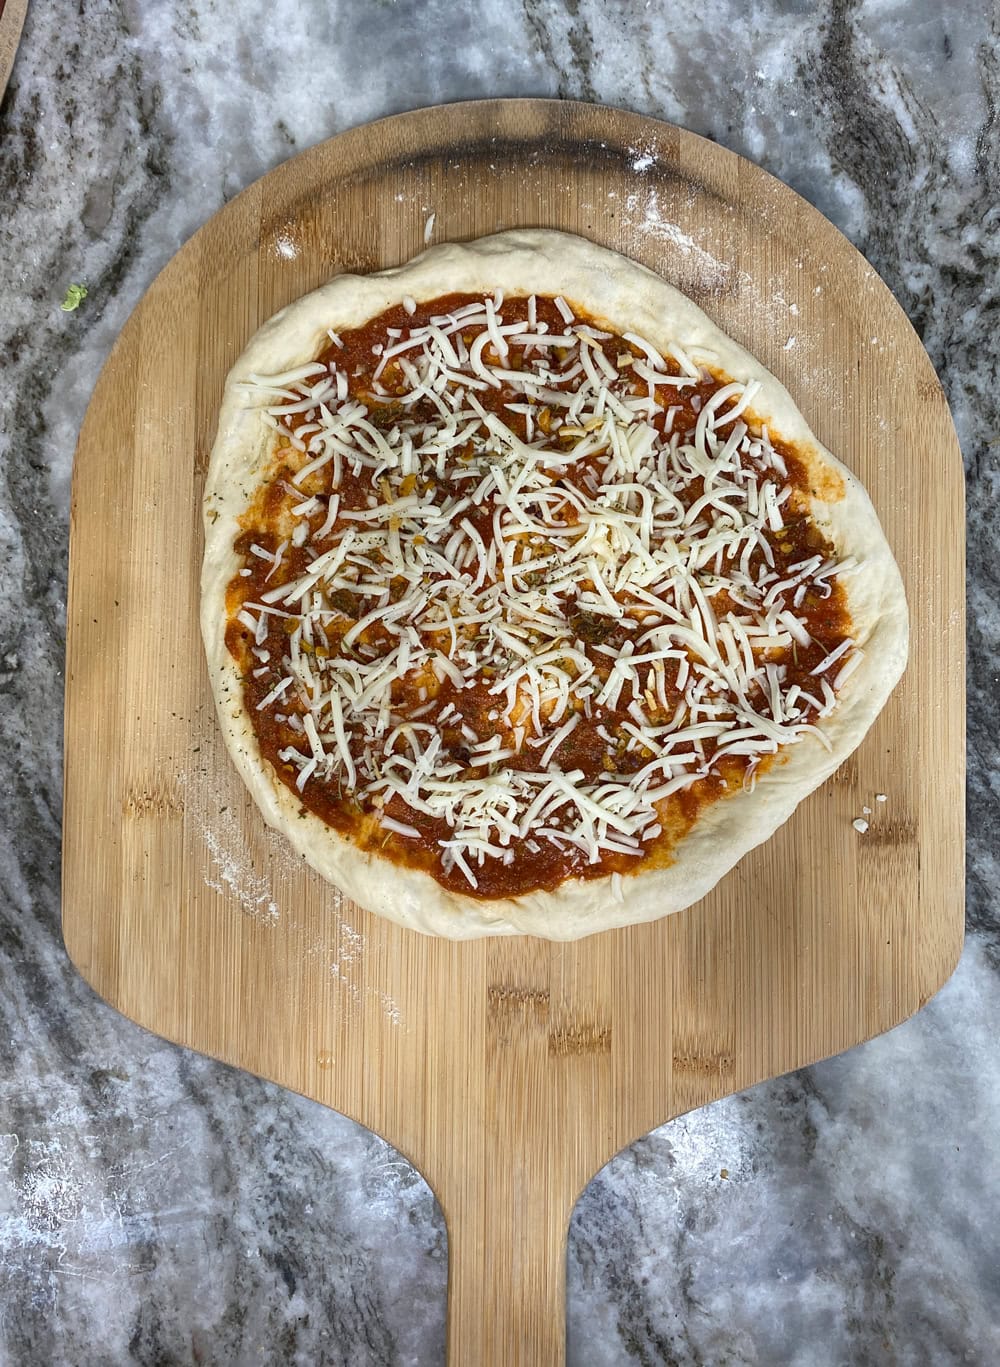
At this point, you’re ready to top your pizza with whatever Trader Joe’s toppings you’d like!
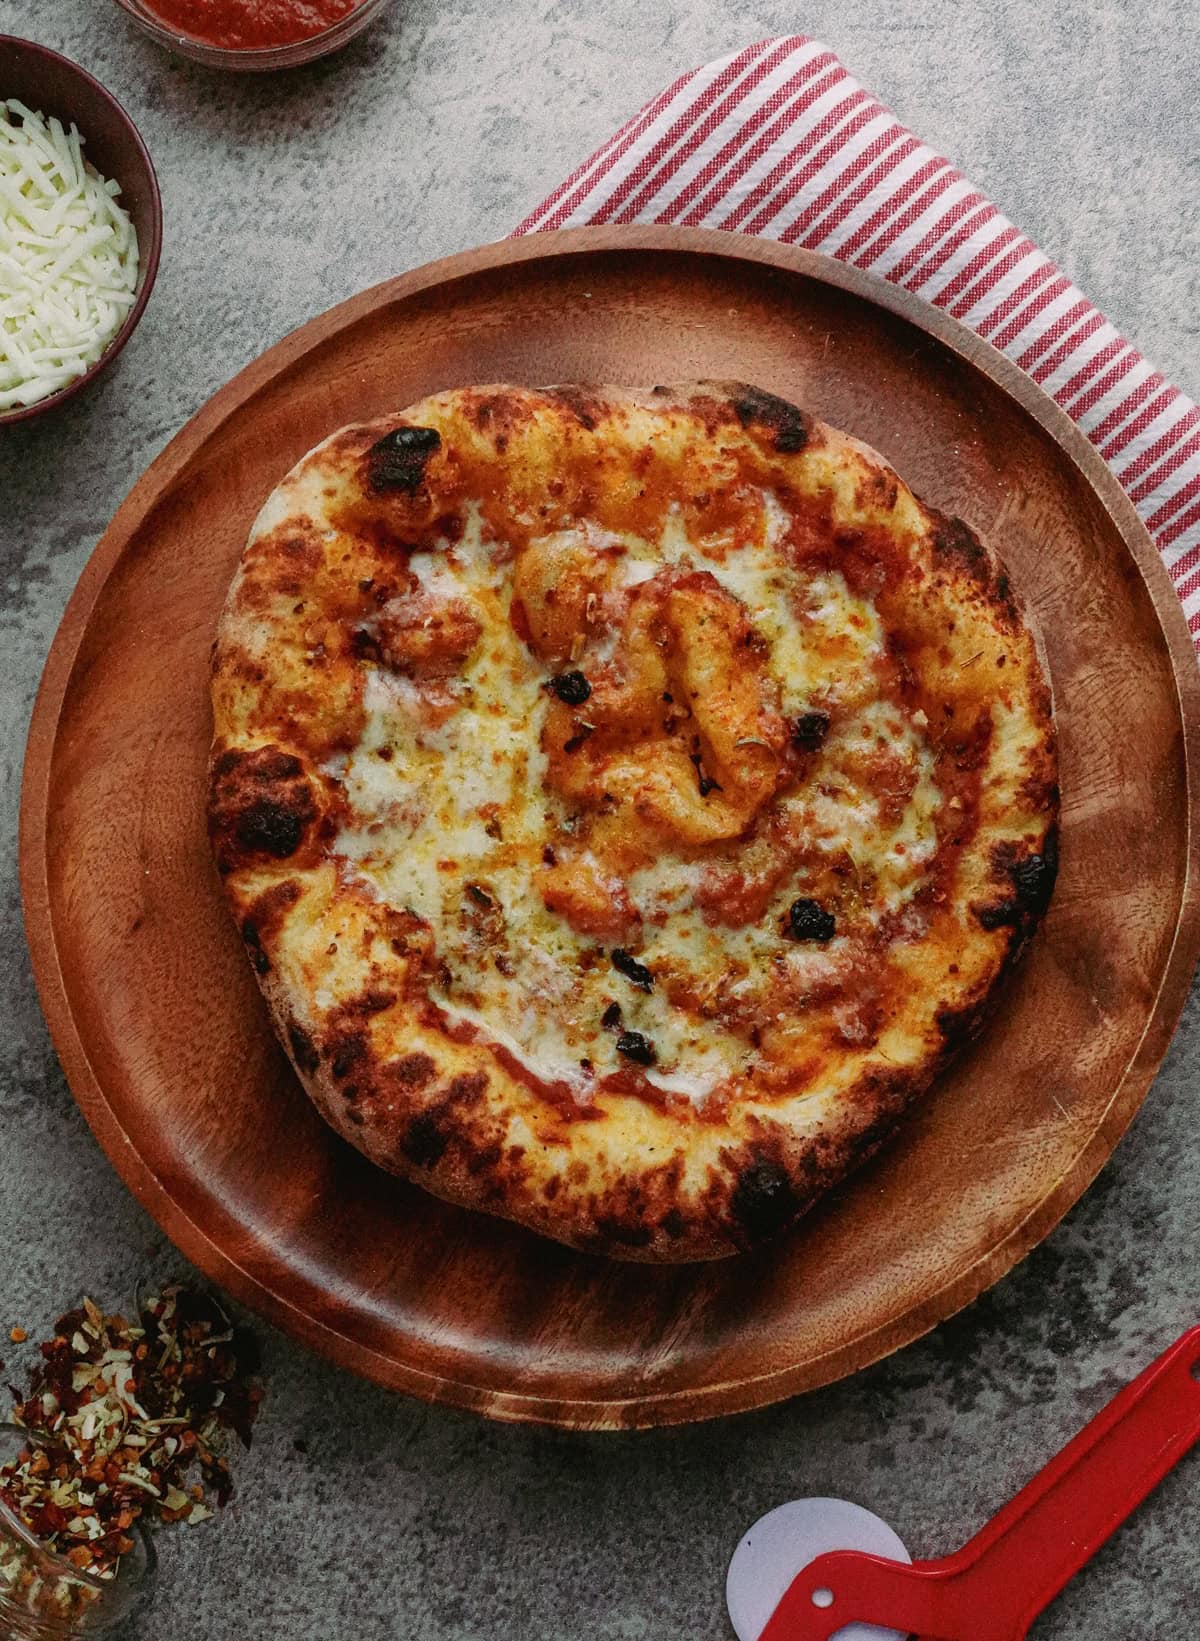
I simply spread a layer of Trader Joe’s Bolognese sauce on the pizza, then top it with shredded mozzarella and soffrito seasoning. Often times, I like to add some fresh veggies on top, too.
How To Cook Your Pizza in a Pizza Oven
Now for the fun part: cooking your pizza! You’ve waited hours for the dough to rise, so now it’s time for you to be rewarded.
The first option for cooking your pizza is using a pizza oven, which is my favorite method.
If you’re using a pizza oven as I do (I cannot recommend the Ooni enough), this pizza will cook in a matter of minutes.
My pizza oven cooking tip: I crank the heat on high while the oven is preheating in order to get the pizza stone to the highest temperature possible. This ensures that the bottom of the pizza will become nice and crispy. However, right before putting the pizza in the oven, I turn the temperature to low so the outer crust does not burn. This strategy has worked great for me!
Carefully slide your pizza into your pizza oven, then rotate your pizza every 15-20 seconds. Since the flame is located in the back of the oven, if you let the pizza sit too long without moving it, the back side will burn very quickly.
When in doubt: keep it moving.
Note: it’s significantly easier to rotate your pizza with an aluminum peel versus a wooden peel. I prep my pizza on a wooden peel, then use an aluminum peel (which is thinner) to move the pizza around.
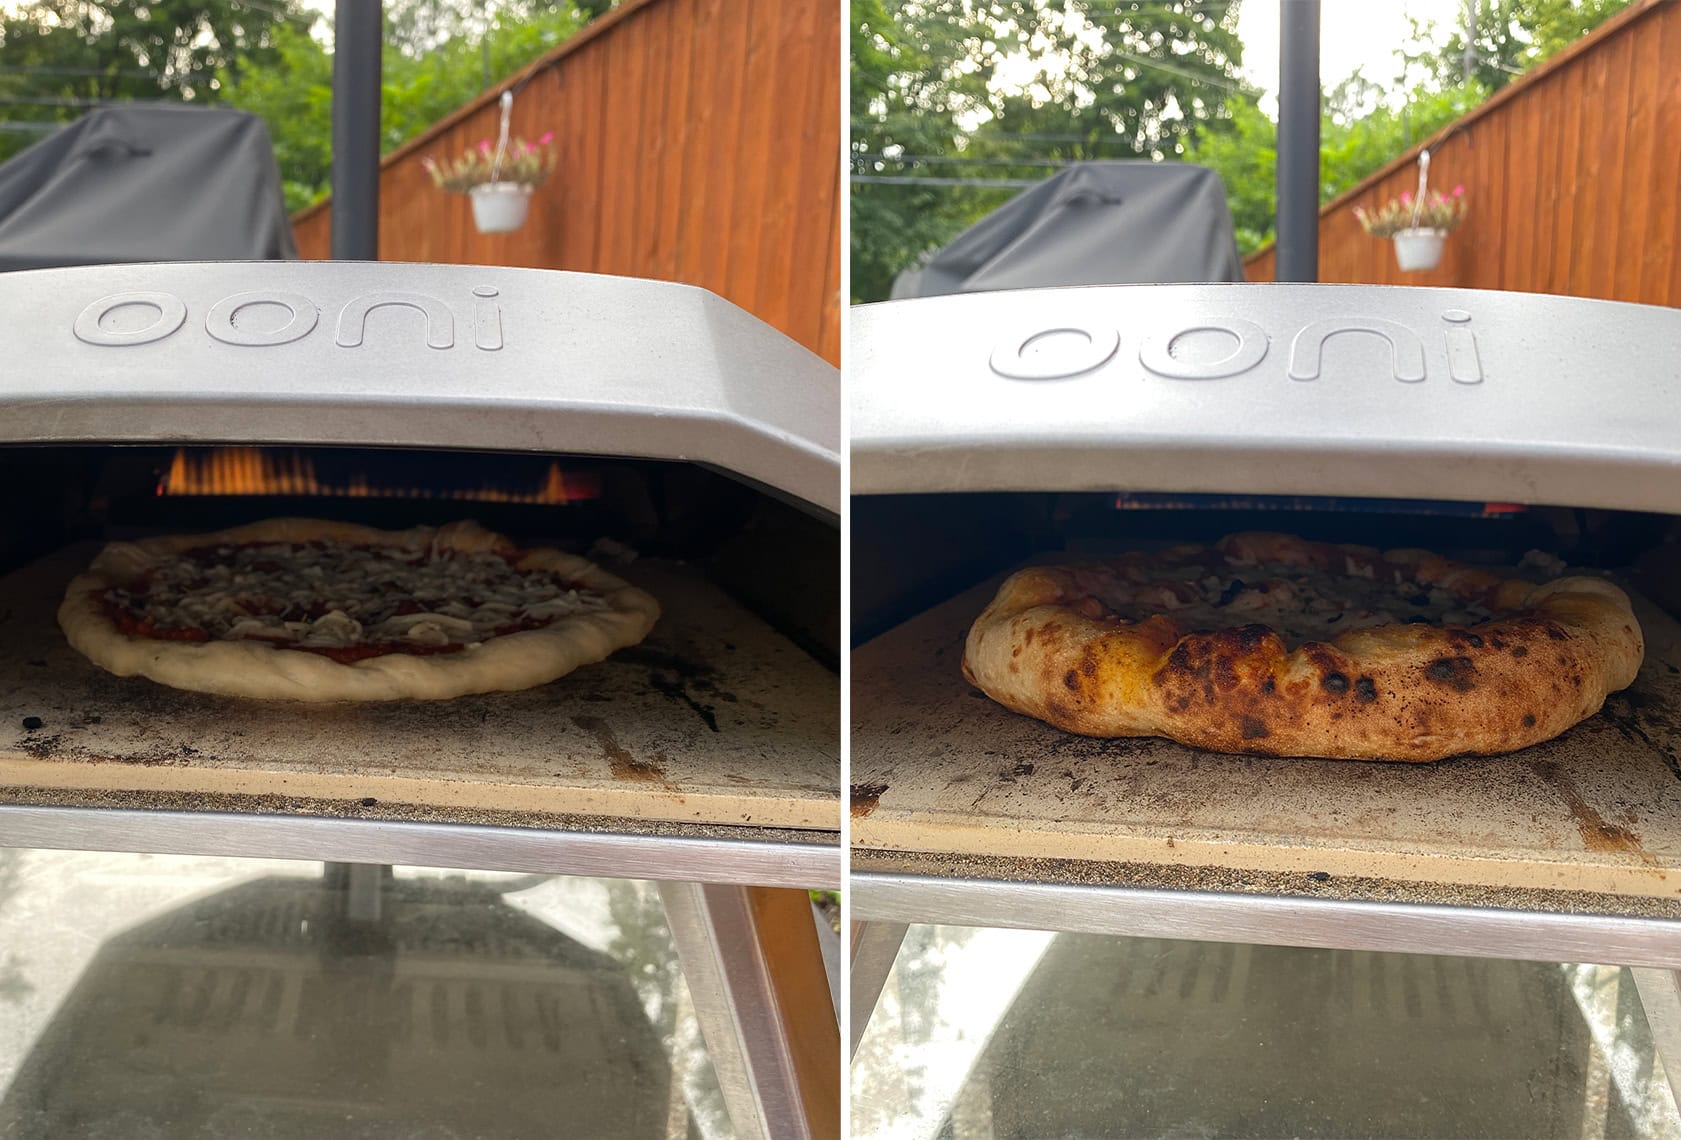
It’s better to turn the pizza too often than not often enough. If the crust isn’t quite browned enough, you can always rotate it back!
All in all, this pizza will be completely cooked in a matter of minutes, so make sure you don’t step away.
You’ll achieve a delicious result in a standard oven, but a pizza oven is worth the investment. Because of my pizza oven, “Pizza Friday” has become a weekly staple in our household.
How to Cook Pizza in a Traditional Oven
You don’t need a fancy pizza oven to make delicious pizza at home! While I recommend it, you can still achieve a beautiful crust in your kitchen with no special equipment.
If you’re using a regular oven, I highly recommend you buy either a pizza stone or pizza steel to create a very hot surface to crisp the bottom of your pizza. Since regular ovens don’t get as hot as pizza ovens (typically topping out at 500 degrees F), using a pizza stone allows the bottom to crisp up very nicely.
However, you don’t even need a pizza stone to make delicious pizza. If you have no special equipment, you can use a baking sheet to achieve a wonderful result.
Flip a baking sheet upside down, then place another baking sheet on the rack directly above it. It will get extremely hot between the 2 baking sheets, giving you a perfect surface to bake your pizza.
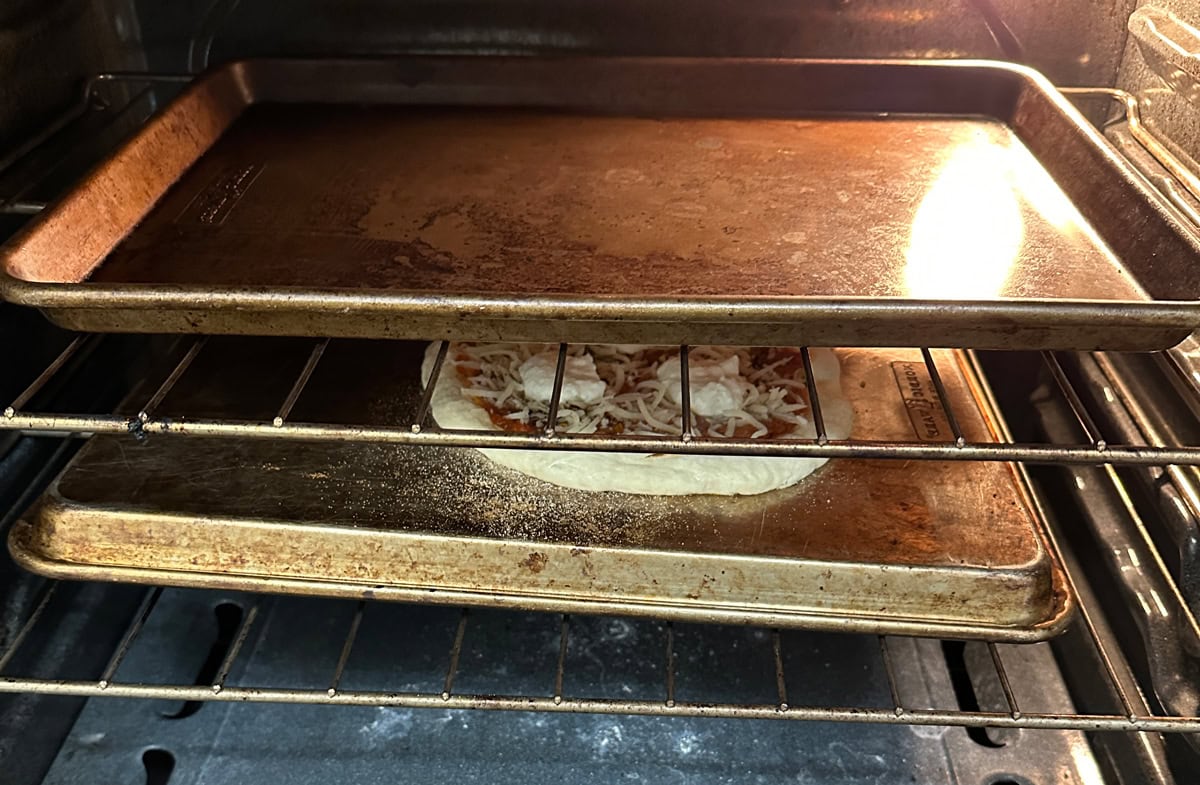
Crank the heat on your oven as high as possible (usually 500 to 525 degrees F) and let your oven preheat for 45 minutes to 1 hour. Preheating is extremely important to get your surface as hot as possible. Without preheating, the top of your crust will cook much faster than the bottom, leading to a much flatter (and often overcooked) result.
Yes, your kitchen might get pretty hot in this time, but it’s worth it!
Once the oven is hot and ready, prep your pizza on a pizza peel with some semolina or corn meal so the pizza can easily slide off, then slide the pizza right onto the upside-down baking sheet (or pizza stone if you go that route).
You may need to rotate the pizza halfway through if your oven tends to have hot spots, but since there is no direct flame like with a pizza oven, it’s not quite as necessary.
The entire pizza should cook in 10-15 minutes, but it will vary based on your oven, so keep an eye on it as it cooks to pull it once it looks ready.
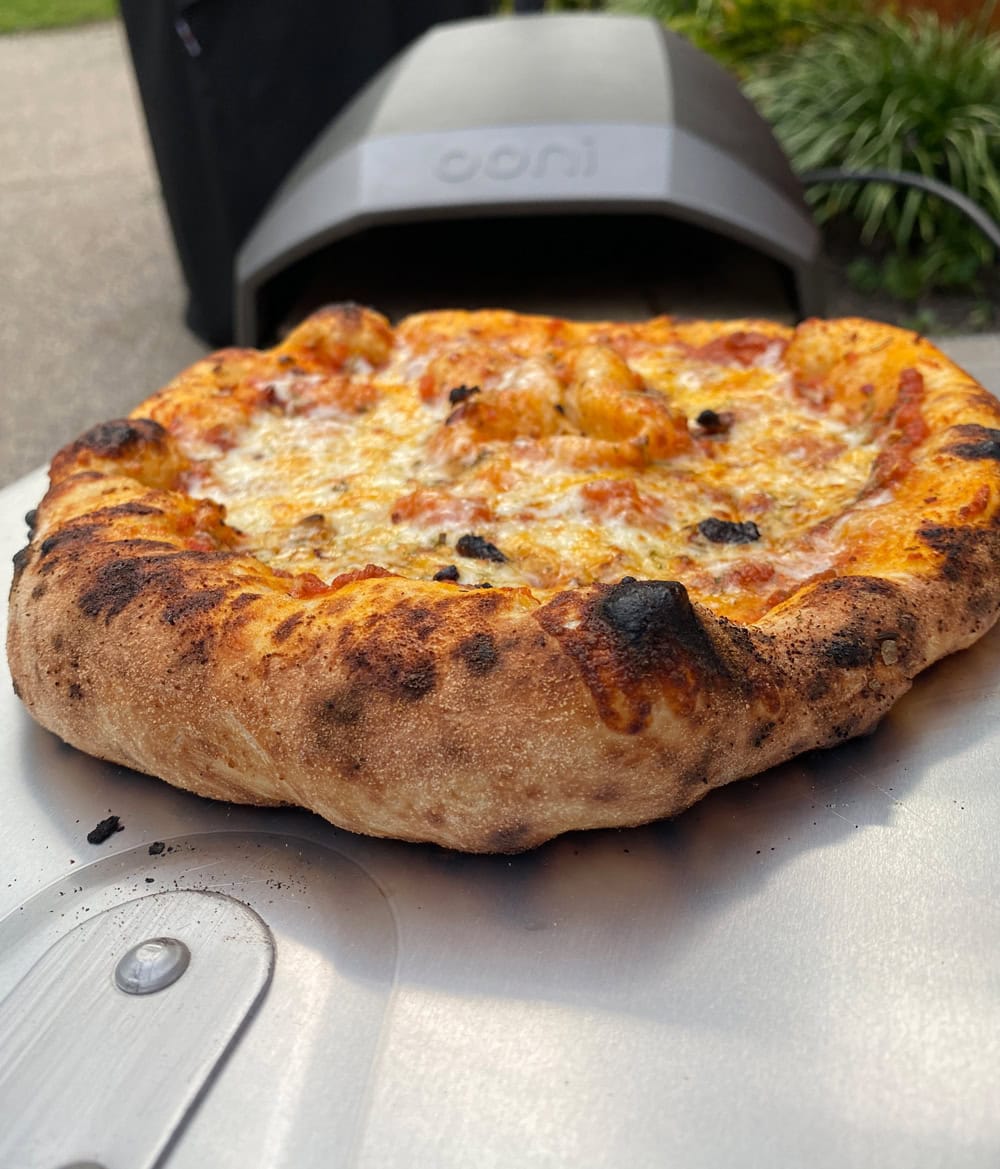
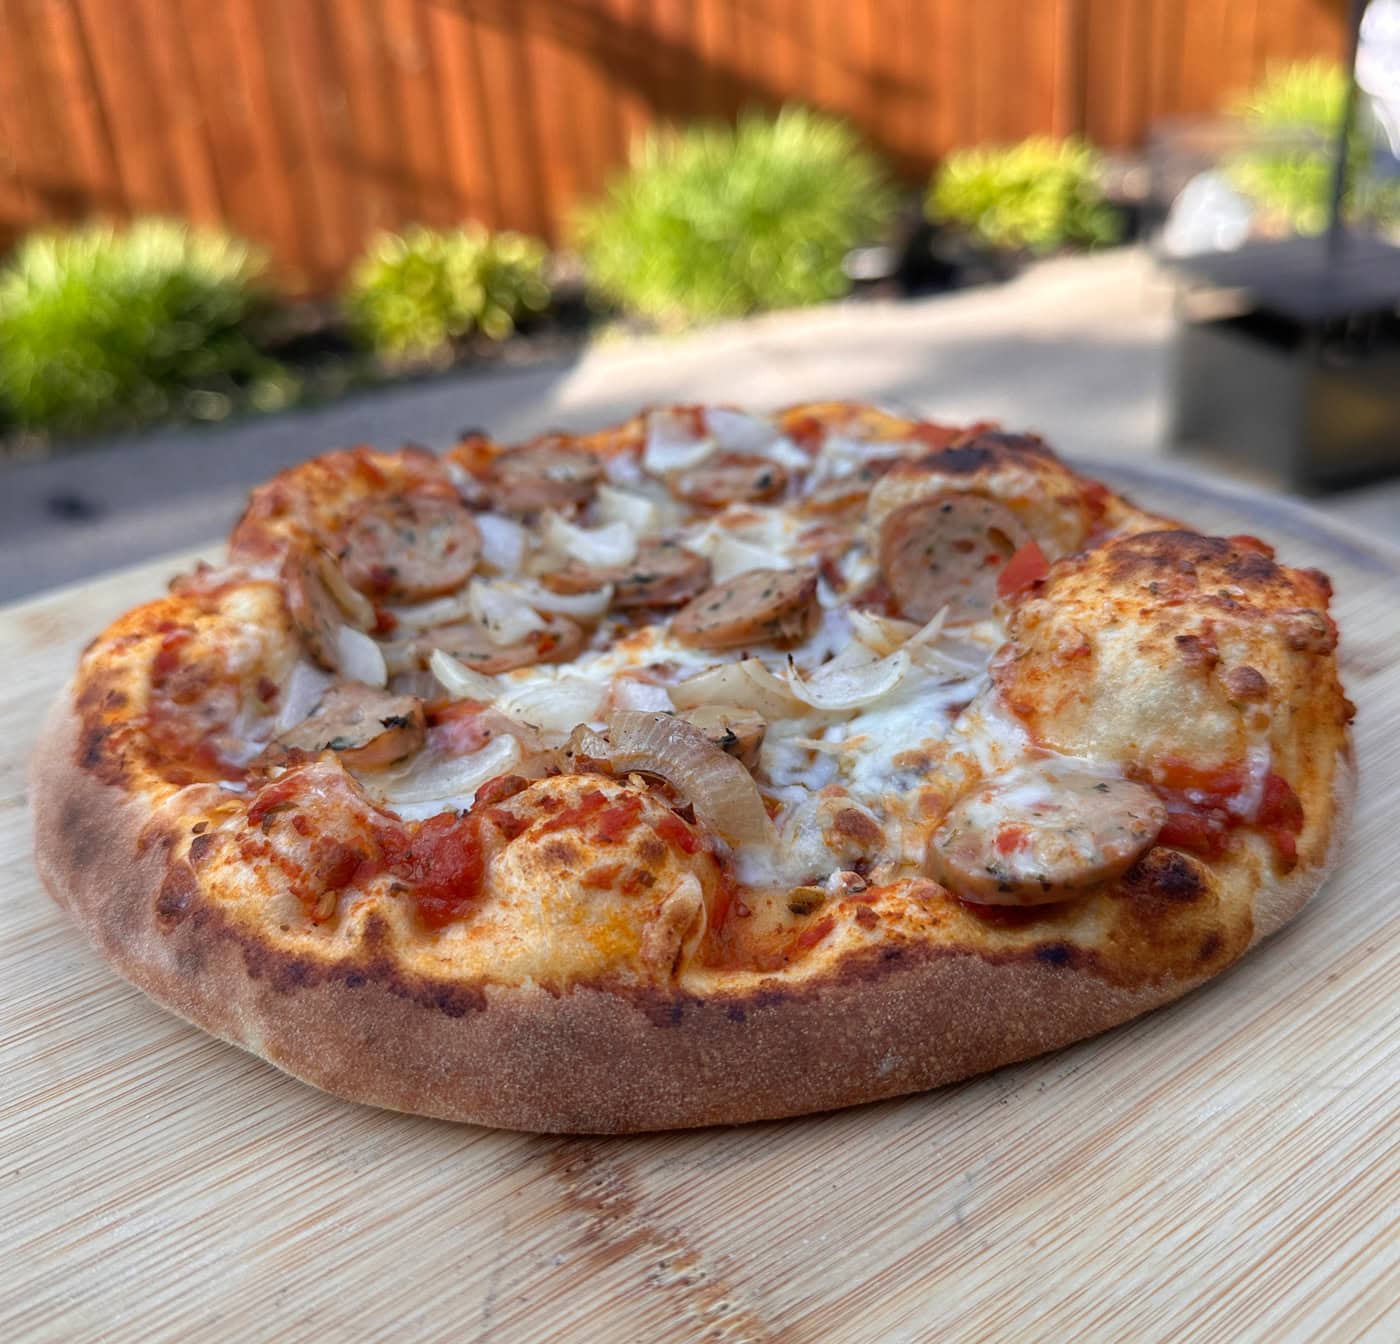
Even with a regular oven, you’ll be able to achieve a wonderfully airy, charred pizza crust. Check out the pizza I was able to make in my oven with just a baking sheet:
For a pizza made in a traditional oven, I am extremely impressed!
I like to top my pizza with some Trader Joe’s Spicy Honey Sauce once I remove the pizza from the oven, and it’s the perfect finishing touch. It may sound odd, but the combination may just change your life if you haven’t tried it.
Otherwise, saving a little extra Trader Joe’s Bolognese (or other sauce) to dip the crust into is an excellent strategy.
If you don’t have a Trader Joe’s near you, first of all, I sincerely apologize. Second of all, you can follow these same instructions using any store-bought pizza dough you can find!
How To Make Trader Joe’s Pizza With Zero Prep Time
Recently, we found ourselves up against it for dinner and had our hearts set on pizza. We didn’t want to settle for takeout, so I decided to see what would happen if I took the pizza dough out of the fridge and immediately cooked it.
The instructions on the package say to let the dough sit for 20 minutes at room temperature before making your pizza, but for my experiment, I wanted to pull it directly out of the fridge with zero waiting time.
First things first: preheat your oven. Whether you’re using a traditional oven or a pizza oven, fire it up while you form your pizzas. For pizza ovens, the preheat time will be much shorter than preferred, but 15-20 minutes is better than nothing.
Remove the pizza dough from the fridge, split it into two, and then get to work forming the pizzas.
Since the dough is cold and tough, you won’t be able to form the pizza with your hands. Instead, you’ll have to use a rolling pin to roll it out thin.
Even though this isn’t my preferred method, I was still able to stretch the pizza to roughly 10″ in diameter.
You won’t be able to form a thick outer crust, but depending on your cooking method, that might not be the end of the world.
Top the pizza with your favorite toppings, then slide it into your hot oven.
If you’re using a pizza oven (which I cannot recommend enough), the outer crust should still puff up plenty.
Honestly, I was surprised at just how much it did puff up. Considering I needed to use a rolling pin to roll the dough out flat, I was not expecting it to be this airy, but that’s the beauty of a pizza oven! The high heat of the pizza stone and direct flame work like magic.
If you use a traditional oven, don’t expect these results- your pizza will become more of a NY-style pizza instead, which is not necessarily a bad thing.
So, how was the final result? Honestly, it came out much better than I expected.
Unfortunately, with no real preheat on my oven, my pizza was still pretty doughy inside, so I needed to toss it into my kitchen oven for about 10 minutes at a low temperature to finish cooking through.
If you’re going this route with no preheat, aim for a lower oven temperature and longer cooke time.
You’ll notice a big difference in the texture of the crust when you don’t allow your dough to rest at room temperature. While it’s still an airy crust, it is significantly denser than when we let the dough sit out at room temperature.
If you’re in a pinch, you can make this work. But there’s a reason I wrote such a long recipe for this Trader Joe’s pizza: because it comes out really, really good.
I recommend following the full instructions for best results (both in terms of texture and flavor), but if you’re facing a pizza emergency, this is not a bad fallback.
Turning Trader Joe’s Pizza Dough into Detroit-Style (or Deep Dish) Pizza
A regular round pie isn’t all that you’re limited to. You can just as easily use these same ingredients to make a square pizza, too!
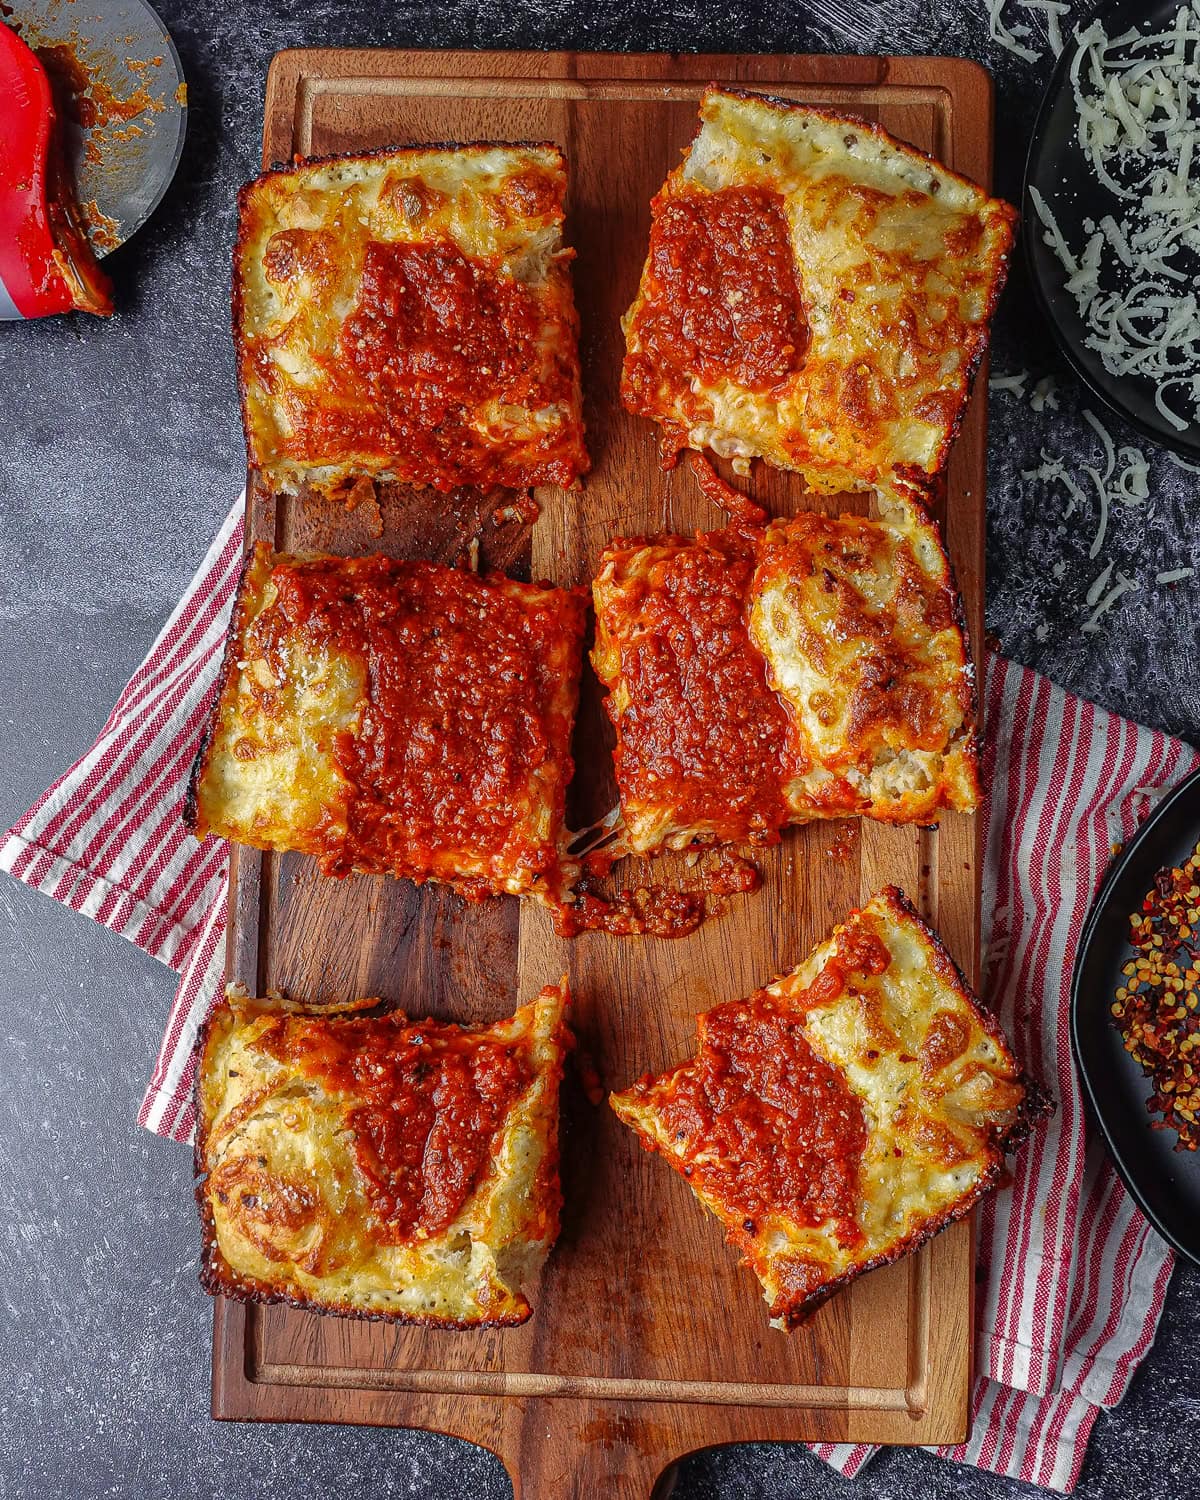
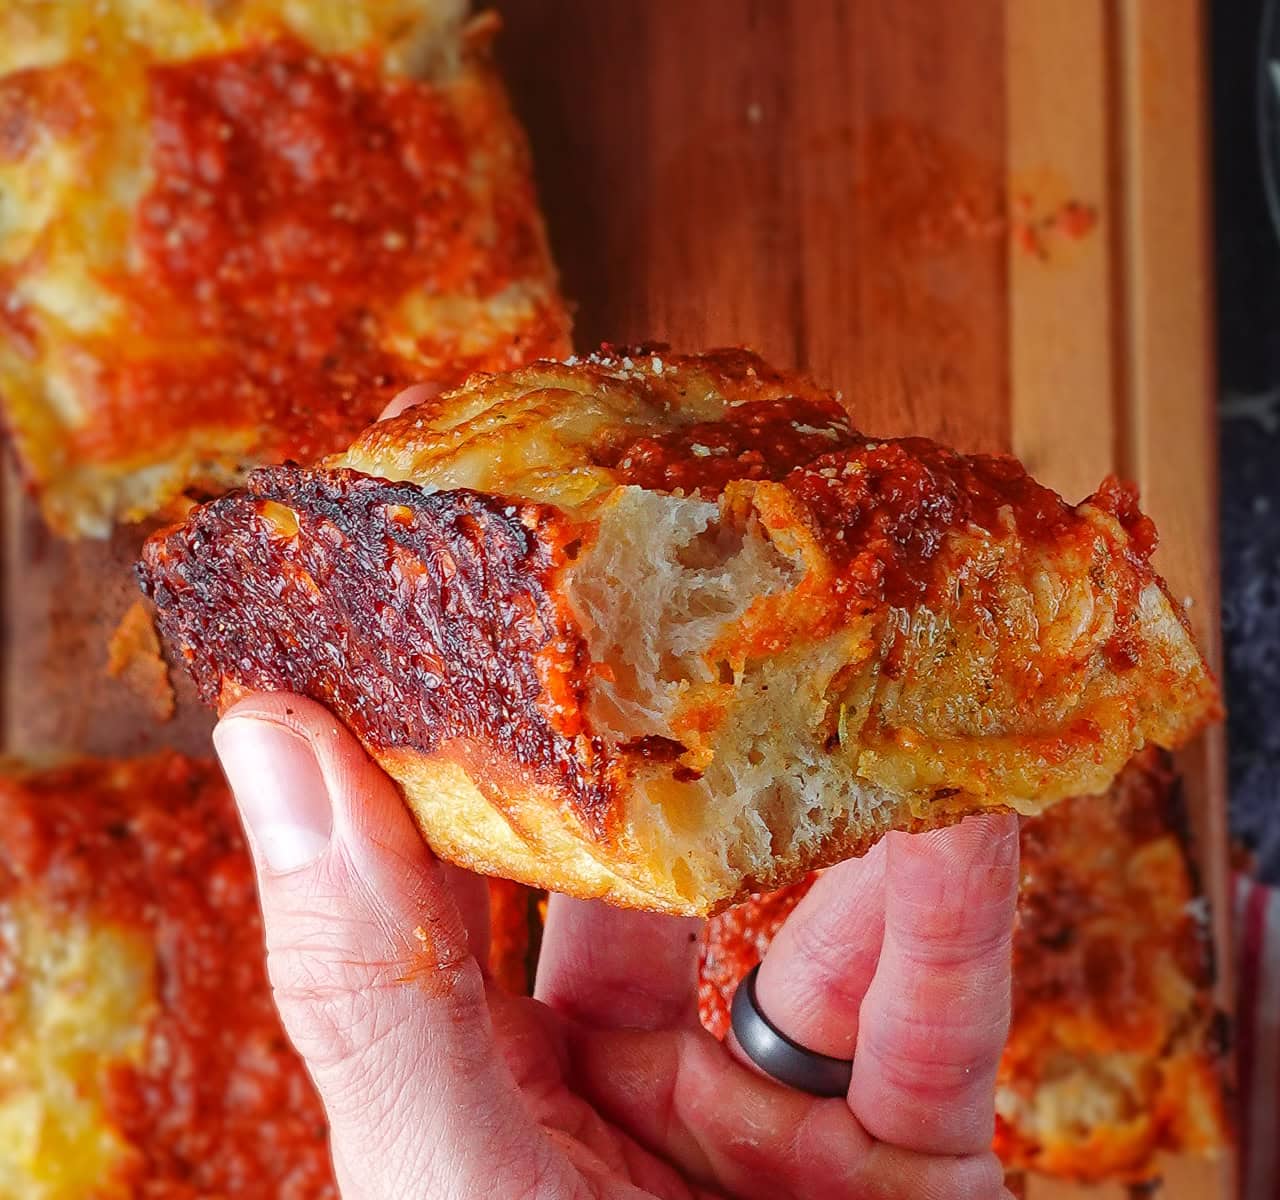
If you’re unfamiliar with Detroit-style pizza, it’s a square pie defined by super crispy edges. The pizza itself is thick and fluffy, similar to a deep dish, but the edges really set it apart.
And to be compeltely honest, it has become my new favorite way to prep the Trader Joe’s pizza dough.
By following this recipe largely the same, but cooking this pizza in a square pan in the oven (no pizza oven required) you’re left with a soft & fluffy deep dish pizza that is out of this world.
Check out my Detroit-Style Pizza recipe here to make your own. And don’t worry, it still only requires a single Trader Joe’s run.
More Trader Joe’s-Inspired Recipes
It’s no secret that I love Trader Joe’s. In fact, I love it so much that I put together a full guide that includes the nutrition facts for over 600 Trader Joe’s products.
I also have some other recipes here on my blog that revolve around Trader Joe’s ingredients, so you can plan to make multiple recipes from your next shopping trip!
- The Easiest Parmesan Truffle Fries
- The BEST Way To Cook Trader Joe’s Orange Chicken
- How To Make The Perfect Crispy Hash Browns in the Air Fryer
- California Burrito (Carne Asada Burrito with Fries)
- 15-Minute Ground Beef Fried Rice
- Elote Beef Taco Bowls in 20 Minutes
And many more to come!

Trader Joe's Pizza (Using Only Trader Joe's Ingredients)
Make a delicious homemade pizza with a single Trader Joe's shopping trip thanks to Trader Joe's pizza dough and their incredible topping options.
Ingredients
- 1 Package Trader Joe's Pizza Dough (Original or Garlic & Herb)
- 1 Tbsp Olive Oil
- 1/2 Cup Trader Joe's Bolognese Sauce (Or Trader Joe's pizza sauce)
- 1 Cup Trader Joe's Shredded Mozzarella Cheese
- Optional: 1/2 Cup Trader Joe's Part Skim Ricotta Cheese
- Trader Joe's Italian-Style Soffritto Seasoning
- Spicy Honey Sauce for Topping
Instructions
- Remove the Trader Joe's pizza dough from the package and add to an airtight container with a small amount of olive oil (about 1 tablespoon). Flip the dough over a few times to cover it in the olive oil
- Cover and let the dough sit at room temperature for 4 hours to double in size. Note that you don't need to let it sit for this long, but I highly recommend an hour at a minimum (the 20 minutes recommended time on the package is not enough for an airy crust).
- Once the dough has doubled in size, split it into 2 equal-sized dough balls, then knead each ball for about 30 seconds to smooth it out. Cover the dough balls with a damp towel or place back into an airtight container for an additional 30-60 minutes for one final quick rise.
- While the dough sits, preheat your pizza oven on high heat setting, or preheat your kitchen oven to the highest temperature (usually 525 degrees F) with a pizza stone or pizza peel inside. If you do not have a pizza stone, you can flip a baking sheet upside down and use that as your hot surface and it works surprisingly well (see notes below).
- Once the dough has rested, shape your pizzas. Press down the center of the dough and then press towards the outer crust to keep the air in the crust. Pick up the pizza dough with your fingers hooked under the crust, allowing the weight of gravity to stretch the dough. You should be able to form two 10" pizzas from your dough.
- Sprinkle some semolina flour (or cornmeal) on a wooden pizza peel and add your formed pizza dough to it. Give the pizza peel a quick shake to make sure the dough moves around. If it's sticking, be sure to add additional semolina flour.
- Top with sauce, cheese, and whatever other toppings you'd like, being careful not to add too many toppings as this is a thin pizza.
- For pizza oven: If using a pizza oven (like the Ooni), I like to turn the temperature to low just before adding the pizza to make sure the flame is not too high to burn the pizza. Slide the pizza into the oven and rotate the crust every 15 seconds to make sure each side does not burn. Continue until the entire pizza is cooked to your liking, which should only take a few minutes.
- For regular oven: Slide the pizza off the peel and onto your hot pizza stone or baking sheet, then bake to your liking. The pizza should only take about 10-12 minutes, but monitor the pizza and pull it from the oven when it is cooked the way you like it, as oven temperatures can vary quite a bit and affect the cooking time.
- Drizzle with some Trader Joe's Spicy Honey Sauce, then slice and enjoy!
Notes
- Pizza oven cooking tip: I crank the heat as high as possible, then turn it down low just before adding my pizza. Once the pizza is done, remove it from the oven and crank the heat as high as possible once more before cooking your second pizza. This will help make sure the oven is hot enough to crisp up your second pizza, too.
- Using a traditional oven with no pizza stone: Flip a baking sheet upside down in your oven, then place another baking sheet on the rack directly above it to create a mini oven inside your oven. Preheat the oven to 525 degrees for 45 minutes to one hour to allow the baking sheets to get as hot as possible. See the notes above this recipe card for a photo of how my pizza turned out using this process- I was very impressed!
- The Trader Joe's Pizza Dough contains 560 calories if you form 2 pizzas from a single dough as I did in this recipe. Otherwise, the entire pizza will have over 1,100 calories in the crust alone.
- You don't have to let your pizza dough sit for 4 hours, but that amount of time works great for me. At a certain point, longer doesn't necessarily equal better, but you won't be causing any harm by letting the pizza rest and rise at room temperature. Aim for at least one hour.
- If you have pizza dough in your freezer, let it thaw in the fridge overnight the day before you plan on making your pizza, or you can pull the dough from the freezer and leave it out at room temperature for about 1 hour to thaw. Then follow this recipe exactly the same way. The pizza turns out great, but I've found that it doesn't get nearly as airy once frozen.
Recommended Products
As an Amazon Associate and member of other affiliate programs, I earn from qualifying purchases.


Nutrition Information
Yield 2 Serving Size Entire 10" Pizza (With All Toppings)Amount Per Serving Calories 720Total Fat 16gCarbohydrates 110gProtein 36g
Great information and directions. Amazing really. I used last year and was worried I couldn’t find this again – and thankfully you are still here. Soooo appreciate your time and effort and photos!
Welcome back! :} Glad you’re enjoying it!
Just made this the other night, had cooked chicken shredded and needed to use it up. Added some small cubed prosciutto and white cheddahhh!
Came out pretty bomb!!! Thank you for this bro, time was key – all the rise makes a difference!
Glad you enjoyed it!! That one does sound bomb
I followed your instructions to make pizza with Trader Joe’s dough the other night, and it was fantastic – even in my regular oven! Thanks!
I’m so glad!
Thanks for making my first experience with this dough a success. Your instructions are perfect!
I’ve used TJ dough in the past but decided to look for other ways to prep it and found you! I followed your directions as written but had one heck of a time getting the dough to press out! It kept retracting! Bad! It was rather comical to my husband and I! I finally had to give up on one dough ball but the other one did ok. It was NOT a circle but a trapezoid!! I preheated the oven to 450° with my pizza stone in it and it cooked up wonderfully! This dough is so good! Any tips to help me for next time is greatly appreciated!!
What’s interesting about the dough is that sometimes it will stretch SUPER easily, and other times it will give you a hard time. More often than not it shouldn’t be an issue as long as it sits out long enough (it usually retracts if the gluten hasnt had a chance to fully relax) but some days you just get unlucky. Either way, I’m glad it cooked up really well for you! And I’m glad it led you here, too :]
@Steph, I had the same problem! But it turned out amazing, anyway. Especially since I prefer a thicker crust.
You are an absolute legend. So detailed and so perfect. My family had a blast making these pizzas with your directions. Thank you!
So happy you enjoyed it!!
You really go to a lot of trouble making a pizza, but to each his own. I store the dough in the fridge until I am ready to use it. I take it out and while cold slice the bag and slowly plop the dough on your cooking surface. When the dough is cold it is very easy to remove it from the bag with only a small amount of dough on my hands – oil your hands and nothing will stick. I don’t go through the rising, etc. it can be left on the pizza pan (I drizzle olive oil on it before the dough) while you are waiting for the oven to heat and making your sauce/toppings. Pop in the oven and get a nice crusty pizza. Ta Da I guess it all depends on how much time you want to spend to make a pizza, for me the sole purpose of buying pre-made dough is simplicity. TJ’s dough is so delicious especially the garlic.
Yep, to each their own.
Hi Matt – Thanks for sharing this process! I’ve been using TJ dough for a while now, but this is far better than the directions that TJ suggests. The only problem I run into is the pie sticking to my peel. I have tried both semolina flour and cornmeal without much success. Maybe I’m not using enough??? Also, I noticed that you use a wood peel, while I use a metal one that come with my Gozney Roccbox. Would you say that the wood peel makes a significant difference? Thanks for your input.
Thank you for the kind words, Steve! I’m so glad this was helpful for you. I can say with 100% confidence that your peel is the issue. I have two peels: one wooden, and one metal. I use the wooden peel to prep the pizza and slide it into the oven, and I use the metal peel to rotate and remove the pizza from the oven since it’s much easier to slide under the pizza. The metal peel tends to stick quite a bit, but once you switch over to a wooden peel with some semolina or cornmeal, the pizza will slide right off!
Thanks for your tips! Just tried this on my new Halo Versa 16 and it was FABULOUS! Really appreciate you taking the time to educate us newbies!
So glad you enjoyed it!! I’m happy to help 🙂
I first looked at the Ooni, only to go with Halo Versa 16. Essentially the same sort of product, except the Versa stone has a separate underside infrared burner and the stone support is motorized to turn itself. No having to sit and turn your pizza while it cooks. Unit has a built-in temperature indicator as well. Both units do a good job of cooking pizzas quickly and both can be converted to run off NG.
Thanks for sharing you TJ tips.
Can you freeze the pizza dough?
Yes you can! It actually freezes quite well. I’ll freeze the dough right in the bag it comes in, and then pull it out of the freezer in the morning when I want to make the pizza. It thaws pretty quickly, in about an hour or so, and then I follow the same exact instructions to prep the dough once it is thawed. Sometimes it is not quite as airy once frozen, but it still turns out great.
Omg it came out bomb. My first one started to rip but I just pinched it.
Love to hear that! Some days the dough will definitely be thinner than others because there are a lot of factors at play, but as you’ve learned it’s a nice easy fix if it ever rips on you.
Just a recommendation, but the fresh low moisture mozzarella is so much better in the Ooni’s and anytime you are cooking at a high heat. The shredded tends to burn/over brown too quickly while the fresh melts beautifully. I buy the TJs fresh whole milk low moisture and cut it into small chunks, makes the perfect pizza.
Great tip, thank you Leslie! I’ll add a note.
Can you explain more how you make this in the Ooni? What temp do you try to get the oven? How long of a cook time? Do you turn off the oven when launching to allow the crust to cook first? Thanks!
I’d love to give you specifics, but I’m still trying to master the Ooni! Mine has a dial for the heat level instead of the thermometer, so I haven’t really gone off any specific temperature. My strategy is to crank the Ooni at max heat for about 30 minutes to pre-heat, then dial it down to about low-medium heat (whatever temp that ends up being) before I put the pizza in. This basically allows you to get a really crispy undercarriage on the pizza without totally charring the outer crust. The cook time itself is probably 3-5 minutes total, I’d say. I’ll slide the pizza in, let it cook for about 30 seconds, then give it a rotation and continue all the way around until the crust is browned to my liking. When I take the pizza off, I’ll crank the heat again for a few minutes before putting the second pizza in to make sure the stone is nice and hot.
Long story short: it depends 😀 You just need to do some trial and error with your specific oven to find the perfect instructions because each one is slightly different (even winter vs summer leads to slightly different cook times with the different outside air)
If you do not have a pizza stone to form this on be careful. I ruined one of my pizzas trying to transfer it to the pizza stone so kind of bummed. The one that made it is good though.
@Brandon Bennington, correction: I have a stone but wish I had a metal disk too and wish I formed it on that
@Brandon Bennington, couldn’t get the existing one off the pizza stone…so can’t really comment on the pizza