Simple Sourdough Pizza Crust
I was born and raised in New York (Long Island, specifically) so I am quite spoiled when it comes to pizza.
Living in Michigan now, I’ve become known as a pizza snob around here. It’s rare for me to find pizza in the Midwest that I actually enjoy.
So, it only made sense to start making my own pizza at home.
I started with a classic Neapolitan Pizza Crust, and I simplified the process for it to only take about an hour. It’s an awesome recipe that I am very proud of, but I wanted to get a little fancier with it.
When the pandemic struck in 2020, it seemed like everyone and their mother started baking bread.
Specifically, everybody was making sourdough.
I fought that trend for a very long time (nearly a full year) because sourdough sounded way too complicated to me.
I mean, you have to keep sourdough alive… who’s got time for that?!

I am here to tell you two things:
- Maintaining sourdough started is insanely easy. Don’t be intimidated by all the terms and the complicated-sounded process. I’m going to make it so incredibly simple.
- The flavor of sourdough is SO worth it.
While I still very much enjoy my classic Neapolitan Pizza Crust, the sourdough crust tastes 10x better. The sourdough adds amazing flavor to the crust, and it’s going to leave you with a crispier crust (AKA no flop).
Just check out this perfect sourdough pizza crust:

Plus, who doesn’t love a good pizza bubble?
You can scroll way down to the recipe card if you’re in a rush, but I recommend reading through everything here if you can spare a few minutes, because I’m going to break down everything for ya in very simple terms.
What the heck is a sourdough starter, anyway?
I’m not going to break down the exact science of sourdough, because frankly, I don’t really understand all of it.
Sourdough is absolutely a science, though. You can use different types of flours, different ratios, different feeding schedules, discards, etc. It’s a lot.
But on a very basic level, sourdough bread (or pizza crust in this case) is made by using a sourdough starter, sometimes called a levain, to give the rise.
Instead of a classic pizza dough that is made by combining flour, yeast, water, and sometimes sugar, sourdough pizza replaces the yeast + sugar for sourdough starter.

What exactly is sourdough starter?
Sourdough starter is simply a combination of flour and water. When you let ‘em sit together for long enough, it creates naturally-occurring yeast, so you don’t need to rely on commercial yeast.
Sourdough creates a wonderfully airy, flavorful, and slightly sour-smelling mixture.
And it is all you need to use to get rise in your pizza or bread!
That’s right, once you create the initial sourdough starter, you can kiss goodbye to your packets of yeast forever. Although, full disclosure, sometimes I do add my own yeast to pizza as well… but more on that in the recipe below.
How do you create a sourdough starter?
If you know somebody who makes their own sourdough, you’re in luck! You can actually take some of their sourdough starter (AKA The Mother) and create your own from that!
It’s a very cool concept, actually. Some sourdough starters go back multiple generations because it is passed from family to family.
That’s pretty damn cool.
We asked one of our friends who had their own sourdough starter to get us started. She provided us a little bit of her sourdough starter in a mason jar, and we were able to take it from there.
If you don’t know anybody who makes their own sourdough, you have two options:
- You can buy some starter! King Arthur Baking sells one that you can find here.
- Make your own. “A Couple Cooks” has a nice easy recipe to make your own sourdough that you can find right here.
How do you maintain sourdough starter?
This is the part that intimidated me about sourdough.
You have to… keep it alive? That’s right: sourdough starter is a living thing!
I had heard that you have to “feed” your starter every single day…
This is why I avoided sourdough for so long. Who’s got time for that?!
What if I go on vacation? What if I forget the sourdough starter in the back of the fridge? What if I just stop caring enough to work with the darn thing every single day?
When we were given a mason jar with a little bit of sourdough starter in it, how the heck was I supposed to know what to do?
Don’t worry- it is so easy!
Feeding your sourdough starter
Feeding a starter consists very simply of adding flour and cold water and mixing it in.
If you search on Google, you’ll find different hydration levels for feeding your sourdough. It gets complicated- you’ll see 75% hydration, 80% hydration, 100% hydration… it’s complex. So, let’s make it way simpler.
All you have to do is add flour and water at a 1:1 ratio (this is technically 100% hydration).
In other words, add the same amount of flour and water to your starter.
Here’s what I mean…

Add dry flour to your sourdough starter. Use the same kind of flour you used to create your starter- typically simple All-Purpose flour. Don’t waste any expensive pizza flour on this!
I typically use 50g of flour, but in this case I needed a little bit more, so I added 70g.

Then you just want to add 70g of cold water to it and mix it up until there is no dry flour left.
That’s right: don’t worry about measuring out specific measurements for flour or water, just go based on weight.
Whatever amount of flour you add to your starter (in grams) add the same exact amount of cold water!
For this sourdough pizza crust recipe, we use 170g of sourdough starter, so it’s important to make sure you mix enough up.
Before you dive into making the pizza, be sure you have more than 170g of sourdough starter. Once you remove the 170g, we want a little bit leftover, even if it’s only 10-20g. If you were to use the entire starter, you’d have nothing left to feed/keep alive, so you’d be starting over from the beginning!
How long do you need to let sourdough starter sit?
Once you feed the starter and mix it up, you need to let it do its fancy sciency things. In my experience, this takes at least a couple of hours.
If you’re going to use the starter for pizza (or any other recipe) the same day, feed it in the morning and just leave it out on the counter (covered) for a few hours before making your recipe.
If you’re prepping the sourdough ahead of time and don’t plan to use it the same day, you can put it in the fridge right after feeding it. This slows the process and will help the starter last longer.
Do you need to discard your sourdough?
You’ll often hear of people using “sourdough discard” for recipes. All this means is that their jar or sourdough starter became very full, so they had to remove some in order to feed it again and keep the starter nice and happy.
When you remove some, that is the discard.
Since we like simple around here, I really don’t worry about that.
I make pizza every Friday, but other than that, I don’t use the sourdough starter for anything else. So, I feed my starter once per week, use the majority of it for pizza, then repeat.
How do you know when to feed the starter?
When people bake a whole lot, they feed their sourdough starter every single day and just leave it out on the counter.
Me, I make pizza once per week, and sometimes I even miss a week. So, my lonely starter just sits in the fridge all that time.
But I’m here to assure you that you won’t kill your starter. Ever.

As long as you store the starter in the fridge, it will have plenty of life in it. But when it gets “hungry,” you’ll see a funky liquid form on top.
When it looks like this, all you have to do is mix it up so there is no more liquid on top, then feed it based on the instructions above!
You can toss it right back into the fridge and you’ll be good to go.
Even if you were to go on vacation for a couple of weeks, your starter will be totally fine. Trust me.
It may get that gross liquid on top, but it’ll come back to life and become nice and full and bubbly once you feed it.
Okay, you’re practically a sourdough expert now! Let’s dive into how to make this delicious Sourdough Pizza Crust…
Schedule for making sourdough pizza crust
Sourdough pizza crust ends up being an all-day event, but it’s mostly hands-off, making it very easy.
Much like working with a sourdough starter, the idea of working on pizza dough all day long was very intimidating to me.
It’s simple, though! If you want to eat dinner between 5 – 6pm, here’s what you’ll be doing…
In the morning (or the night before): Feed your sourdough starter (remember: all that means is adding some flour and water and letting it sit).
12:00pm (Noon): Mix up the dough, cover it, and let it sit for about 4 hours to proof.
Around 4pm: Divide the dough into 2 pieces, form them into round balls of dough, and cover with a damp cloth for one more hour.
5pm: Your sourdough pizza dough is ready to go! Form your pizza, add your toppings, and cook!
As you can see, there are quite a few hours involved here, but the actual hands-on time is very low. In total, you’ll only be working with the dough for 5-10 minutes!
Here’s what each step is going to look like…
Step-by-step instructions for making sourdough pizza crust
Step 1: Add pizza flour, salt, garlic powder, and yeast (optional) to a large mixing bowl.
The whole point of sourdough starter is that you don’t have to use yeast, but I actually like to add a tiny bit to my dough to add a little extra rise. If you leave it out, you’ll be totally fine!

Note: Pizza flour is HIGHLY recommended here and is 100% worth buying. It will create a thin, crispy crust much better than normal All-Purpose Flour will.
Step 2: Add warm water along with your sourdough starter to the bowl.
If your starter is in the fridge, you can take it out of the fridge and add it directly to your bowl. If you fed the starter in the morning, it’ll be fine at room temperature, too. I’ve done both with great success!

Step 3: Turn your mixer on low-medium to allow everything to come together. It may take a minute, but it will all mix!

Once a ball of dough forms, allow the mixer to beat the dough for about 5 minutes.

Step 4: After 5 minutes of mixing, drizzle olive oil around the dough. I use my hands to flip the dough over (you almost need to peel it away from the bowl) and move it around in the bowl to make sure the entire thing is covered with some of the olive oil.
Note: The dough is going to be very sticky- that’s to be expected!

Step 5: Cover the bowl with plastic wrap and let the dough sit for 4 hours.
You can leave the sourdough pizza dough out on the counter, but the indoor temperature can really vary based on the season. I like to put the bowl in the oven with the pilot light on to keep it at a nice warm temperature (do not turn the oven on or the dough would dry out!)

After 4 hours, you’ll see that the dough has about tripled in size!

Step 6: Remove the dough from the bowl (use your fingers to peel it off the edges, because it will still be sticky) and onto a floured surface.
Weigh your dough ball so you can then divide it into 2 equal-sized pieces. The exact weight will vary, but it should always weigh in between 500 and 525g if you follow my recipe!
In my case, I wanted to make each individual pizza roughly 252 grams.

Simple pinch the dough in the middle and pull it apart. If you weigh your dough balls and they are not equal, it’s okay to pull a piece off and add it to the other one.
If you do that, simply tuck the extra piece into the dough and fold it over, like so:

Step 7: Form your 2 pieces of dough into dough balls. You don’t want to knead the dough- all we need to do is form them.
I use the push & pull method: push the dough up and out with your palm, then pull it back with your fingers. Sound confusing? Just check out this very short video of how I form my dough:
Notice in the video how you can see the little air bubbles in the dough- this is why we don’t want to knead the dough! We want to be gentle with it to keep the air in it.
Once you’re done, you should be left with these 2 beautiful mounds of sourdough pizza dough:

Step 8: Cover the dough with a damp towel (using a hand towel or paper towel, just make sure they are completely wet or the dough can dry out) and let sit in a warm place for one more hour.
Just like my initial rise, I like to let these sit in the oven with the light on to keep them nice and warm.

After an hour, check out how much this dough has poofed up!

Step 9: Now it’s time to form the pizzas! This dough is slightly different than my Neapolitan Style Pizza Crust in the sense that the dough will be very loose. It’s going to be very light, airy, and easy to form in into your pizza.
Start by pressing down the center of the dough and working your way out towards the crust. This pushes all the air into the outer crust, giving us that bubbly crust that we love so much.

You should be able to see the little air bubbles in the crust:

Next, I like to pick the dough up by hooking my fingers underneath the outer crust.
Work your hands in a circle around the crust, allowing gravity to do the work for ya. Since this dough is so light, it will form itself quite quickly!

Here’s a before and after of using that “hooked finger” method:

Your pizza is going to end up about 10 – 12″, depending on how thin you go with it.
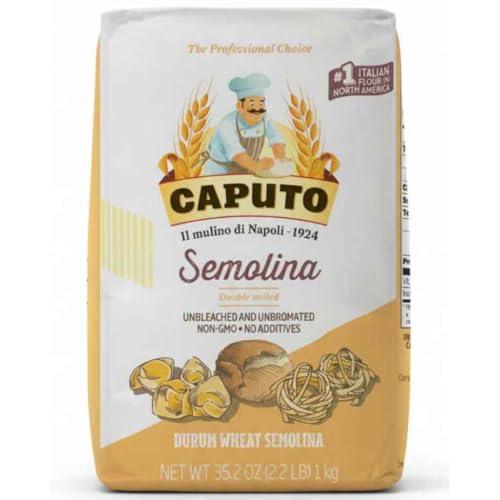
Take some semolina flour (I buy this one and it’s lightyears better than any other brand I’ve used, but cornmeal also works) and sprinkle it over your pizza peel before adding your sourdough pizza crust.

Step 10: Top your sourdough pizza crust and bake!
I have a pizza oven at home, but you can bake this pizza in a regular oven as well. In a pizza oven, this should only take a few minutes.
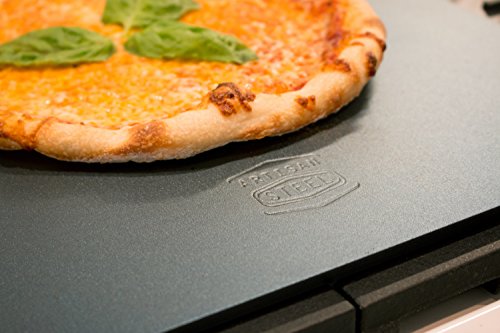
If you’re using a regular oven, I highly recommend getting yourself a pizza stone (or even better, a pizza steel) and then cranking your oven at 500 degrees F, allowing the stone/steel to preheat for about 30 minutes. This will allow your sourdough pizza crust to get super crispy!

I mean, how beautiful is that?
The sourdough creates such an amazing flavor in this sourdough pizza crust, and it is by far my favorite homemade pizza ever!

Is sourdough pizza healthy?
I post healthy / high-protein recipes here on my blog, so you may be wondering if an authentic sourdough pizza crust is actually healthy.
In terms of nutritional value, this pizza is shockingly healthy! We’re not using any crazy substitutions or ingredients that are typically thought of as low-calorie, but this entire sourdough pizza crust (without the toppings) is…
515 Calories, 0g Fat, 119g Carbs, 16g Protein. For an authentic pizza, I’ll take it!
If you’re someone who likes to figure out calories/macros, how do you figure out these calories when using a sourdough starter?
Well, since the starter is half flour and half water, you just have to divide in half!
Since we use 170g sourdough starter, we know that it’s 85g of flour (with the rest being water). So, we add 85g of flour to the other 225g of flour we’re using in this recipe for a total of 310g of pizza flour!
But, calories and nutrition aside, this is real-deal pizza, so it’s 100% worth it.


Simple Sourdough Pizza Crust
Using a simple sourdough starter, we're going to make the best homemade pizza ever. Don't worry if sourdough is intimidating to you- it's actually very easy. We're going to make two 10" pizzas with this one!
Ingredients
- 225g Pizza Flour (Italian 00 Flour)
- 170g Sourdough Starter
- 5g (1 Tsp) Salt
- 4g (1 Tsp) Garlic Powder
- 2g (1/2 Tsp) Instant Yeast (Optional)
- 106g Warm Water (Roughly 1/2 Cup)
- 1 Tsp Olive Oil
- Semolina Flour or Cornmeal for dusting your pizza peel
Instructions
- To make the pizza, we want an active sourdough starter. It's easiest to feed your starter the night before you plan to make your pizza, but you can also feed it in the morning before making the pizza. There are plenty of details on feeding a starter (or starting your own) in the notes above this recipe card.
- To make the pizza dough, take your stand mixer bowl and add the pizza flour, salt, and garlic powder. I like to add a small amount of yeast as well for some extra rise, but that is truly optional. The starter replaces the need for any yeast, so you can leave that out.
- Add your sourdough starter to the bowl (it doesn't matter if the starter is room temperature or right out of the fridge), and then add the warm water. When it comes to water, I find it easiest to just add it based on weight for the most accurate measurement.
- Using a dough hook, turn the stand mixer on low-medium until it all comes together, then let it continue mixing for about 5 minutes to knead the dough.
- Drizzle olive oil around the dough in the bowl. I use my hands to flip the dough over (you almost need to peel it away from the bowl) and move it around in the bowl to make sure the entire thing is lightly coated with some of the olive oil. Don't skip out on the oil- this is going to help the dough retain moisture!
- Cover the bowl with plastic wrap and let the dough sit in a warm place for 4 hours. I recommend putting the bowl in the oven with just the pilot light on to keep it at a consistently warm temperature.
- After 4 hours, the dough will have poofed up to about 3x the size. Remove the dough from the bowl (use your fingers to peel it off the edges, because it will still be sticky) and onto a floured surface. Weigh your dough, then divide it into 2 equal-sized pieces.
- Without fully kneading the dough, form each piece into two pizza dough balls. If you need some visual assistance, be sure to check out all the notes above this recipe card.
- Cover the dough with a damp towel, then let sit in a warm place for one more hour.
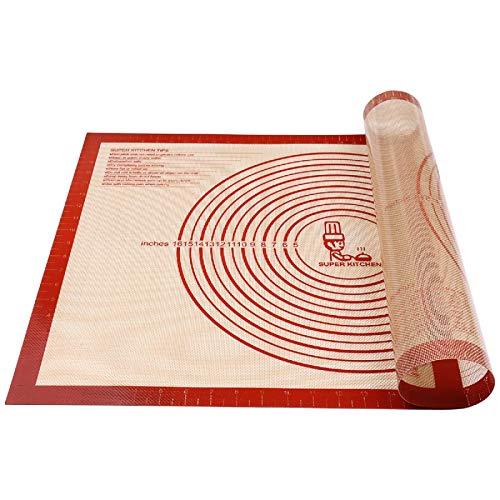
- Take your silicone pizza mat (any surface will work) and sprinkle it with some semolina flour. Add your pizza dough to the floured surface and form the pizza. Start by pressing the dough from the middle out towards the crust to keep the air in the crust, then pick the pizza up and allow gravity to stretch it to size while rotating around the crust. You should be left with two pizzas about 10 - 12 inches.
- Sprinkle more semolina flour on your pizza peel to make it easy to slide the pizza off, then cook and enjoy! If using a pizza oven, this should only take a few minutes (be sure to rotate it to avoid burning). In a conventional oven, I recommend letting a pizza stone/steel preheat in the oven at 500 degrees F for about 30 minutes, then adding your pizza. It should cook in about 10 minutes or so.
Notes
- 00 Pizza Flour is HIGHLY recommended here! All-Purpose flour works in a pinch, but trust me on this one- pizza flour will give you the thin bottom crust and a bubbly outer crust. There's just nothing like it. If you have a pizza oven, I recommend this flour. If you're using a conventional oven, I recommend this flour.
- If you're brand new to pizza, I recommend giving my Neapolitan Pizza a try (it only requires one hour) then moving on to this sourdough version!
Recommended Products
As an Amazon Associate and member of other affiliate programs, I earn from qualifying purchases.


Nutrition Information
Yield 2 Serving Size 10" Pizza (Crust Only)Amount Per Serving Calories 515Total Fat 0gCarbohydrates 118gFiber 5gProtein 16g
My family absolutely loves this pizza dough recipe!
What would be the best way to make and store in advance?
So saying try is takes 30 mins and additional time of 5 mins is not correct… you’ve forgotten to mention the 4HOURS of resting time….
Saying this takes 30 mins that was supposed to say.
You’re right, it’s supposed to have the resting time there. It’s in the instructions, but I’ll make it more prominent to avoid confusion.
I made your crust a few nights ago with organic unbleached all purpose flour, (all I had available) and it was so tasty and a big hit with my husband! I am going to make it for us again tonight! 🙂 Thank you so much for the great recipe and easy to follow instructions!
Ahh that’s amazing, thank you Kelsey! 🙂
Supinos 2457 Russell St, Detroit, MI Is where most of us New Yorkers end up for pizza (Im from Long Island too) Living in Marquette now. But when I get to Detroit its Supinos. It even smells like NY when you walk through the door.