High-Protein Brownie Cookie Skillet
If you’re torn between making brownies or cookies for dessert tonight, I’ve got the perfect solution for you… why not have both?

I’ve been experimenting with combining my love for fudgy brownies and skillet cookies, and the result is this incredible high-protein brownie cookie skillet. It’s the best of both worlds.
If you’re a chocolate fan, this is going to become one of your go-to dessert recipes because it is surprisingly simple to throw together. Each slice contains 12 grams of protein while keeping the calories at just 190. Not bad for a generous slice of fudgy brownie!

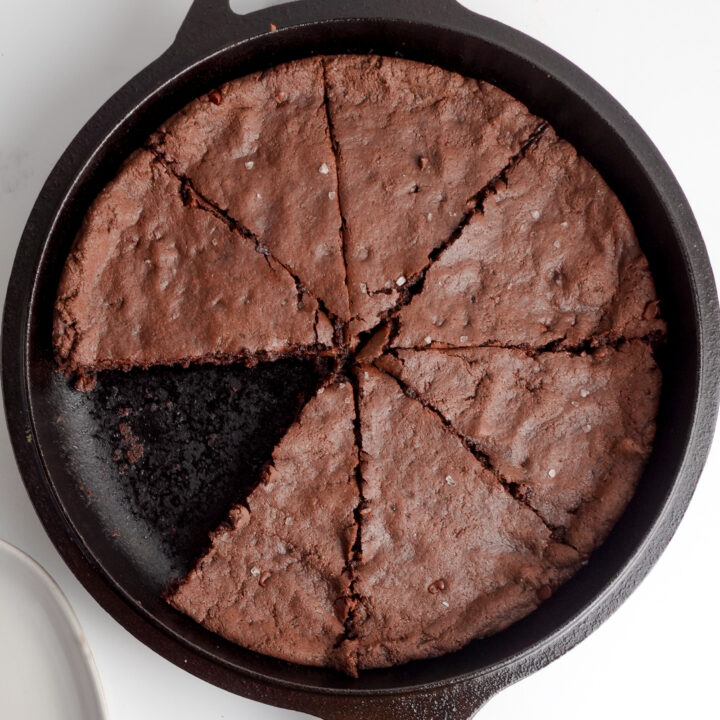
When you slice into this skillet, you’ll get the satisfying edges of a cookie with the fudgy center of a perfectly baked brownie. As a fan of the gooey center of a brownie, I can say that this fudgy texture does not disappoint.
How To Make a Brownie Cookie Skillet
To make this brownie cookie skillet, you’ll need a few key ingredients:
For the dry ingredients, we’re using a chocolate whey/casein blend protein powder, oat flour, a touch of almond flour, unsweetened cocoa powder, brown sugar substitute (or regular brown sugar), baking soda, and a pinch of salt.
For the wet ingredients, you’ll need creamy peanut butter, light butter or buttery spread (to reduce the calories a bit), and unsweetened applesauce.
And of course, we can’t forget the chocolate chips to give it those gorgeous melty pockets of chocolate!
The method matters almost as much as the ingredients in this recipe. One crucial technique I’ve discovered is adding the protein powder last.
Why? Protein powder absorbs a tremendous amount of moisture. By mixing all other ingredients first, then folding in the protein powder at the end, we create the perfect dough consistency. Check out this before and after when adding protein powder:

This might seem like a small detail, but it makes all the difference between a sticky, gooey mess and cookie dough that we can easily form with our hands.
The Baking Process
Many cookie recipes require chilling the dough before baking to achieve the right texture, but with this skillet we can skip that step. That means that all you have to do is mix the ingredients, put the dough in a skillet, and bake.

I use a 10″ cast-iron skillet to make my brownie cookie skillet, which I find works very well. This leads to a thin cookie, so if you prefer something thicker and more brownie-like, you can use a smaller skillet to achieve that result!
The skillet only needs about 12 minutes in the oven. Since all the ingredients are safe to eat raw, it’s perfectly fine to underbake it slightly for an even fudgier result, although 12 minutes leads to a wonderfully fudgy interior.
Even though this recipe comes together quickly and easily, there’s one small caveat: After baking, you absolutely must let the skillet cool for a full hour.
I know it’s tempting to dig in right away (believe me, I’ve been there), but this cooling time is essential. It allows the brownie cookie to set properly and develop that perfect fudgy texture.
If you cut into it too soon, you might think it’s undercooked when actually it just hasn’t set yet. Trust me, that hour wait is worth every minute!

Serving Suggestions
This brownie cookie skillet is delicious on its own, but for an extra-special treat, try topping a warm slice with a scoop of vanilla ice cream. The contrast between the cold ice cream and warm brownie cookie is insane.

This brownie cookie skillet would also be incredible to make ice cream sandwiches with, and that’s likely what I am going to try next. You can bake two of these in square pans, add some ice cream in the middle, and sandwich them together… yeah, I have to try that now.
Making It More “Brownie-Like”
If you’re firmly in the brownie camp and want something thicker, you have options! You can easily double the recipe for a thicker result, or simply use a smaller skillet.
I know that many people just want to take a spoon and dig right into a gooey brownie skillet, so you can definitely go that route.
Just keep in mind that if you want to make it thicker, you’ll need to bake it a bit longer. But remember – underbaking is not a problem with this recipe, so when in doubt, pull it out early for that fudgy center!

Storing Leftovers
I don’t blame you for wanting to eat the entire skillet, but if you decide to show a little self control, this brownie cookie stores very well. I find the texture holds up best when stored in the refrigerator, but room temperature works fine too. When stored at room temperature, it just tends to end up softer overall.
For a quick dessert later in the week, a brief 10-second spin in the microwave will bring back that fresh-from-the-oven texture and warmth.

This high-protein brownie cookie skillet has immediately become one of my favorite chocolatey desserts. But if this one doesn’t do it for you, I’ve got a bunch of other high-protein chocolate recipes here on my blog. Here are some of my favorites:
- 90-Calorie Protein Brownies with Crackly Tops
- Mouthwatering Oatmeal Brownies (With Protein)
- High-Protein Edible Brownie Batter
- Healthy Chocolate Crinkle Cookies (Protein Packed)
- High-Protein Chocolate Peanut Butter Spread
- Hot Chocolate Cookies with 10g Protein
High-Protein Brownie Cookie Skillet
Is it a cookie or is it a brownie? Well, it's both! The skillet slices up like a traditional skillet cookie, but has the soft and fudgy interior you'd expect from a gooey brownie. All of this with 12 grams of protein per slice!
Ingredients
- 99g (3 Scoops) Chocolate Whey/Casein Blend Protein Powder (code "Matt" to save on PEScience brand)
- 60g (½ Cup) Oat Flour
- 10g (About 1 Tbsp) Almond Flour
- 20g (¼ Cup) Unsweetened Cocoa Powder (I used Hershey's Special Dark for a more intense flavor)
- 75g (About 6 Tbsp) Brown Sugar Substitute (or regular brown sugar)
- ½ tsp Baking Soda
- Pinch of Salt
- 30g (2 Tbsp) Dark Chocolate Chips
- 64g (¼ Cup) Creamy Peanut Butter (or any nut butter)
- 56g (¼ Cup) Light/Spreadable Butter (I use Country Crock Original)
- 100g (4oz Single-Serve Cup) Unsweetened Applesauce
Instructions
- Preheat your oven to 325° F.
- In a large bowl, mix together the wet ingredients (butter, peanut butter, and applesauce).
- Add all of your dry ingredients except for the protein powder and mix until a thick brownie batter forms.
- Add the protein powder to your bowl, then mix until a thick cookie dough forms. We add the protein powder last because it absorbs a lot of the moisture, which helps to thicken the mixture into a workable dough.
- Fold in your chocolate chips.
- Lightly spray a 10" skillet with cookie spray and add the cookie dough, then press it down to reach the edges. I like to top mine with a sprinkle of sea salt once formed, but that is optional.
- Bake at 325° F for 12 minutes. Note that all of the ingredients are safe to consume raw, so there is no harm in under-baking this skillet brownie cookie.
- Remove the skillet from the oven and allow the skillet to cool for one hour. The brownie cookie needs time to fully cool and settle into the perfect fudgy texture.
- Cut into 8 slices and enjoy as-is or top with ice cream for an extra treat!
Notes
- I very much want to call this a skillet brownie, but I know many people would disagree because it's thin like a cookie. If you want to make this recipe more brownie-like, you can double the recipe to create a thicker brownie, or use a smaller skillet. You'll need to bake the skillet for a bit longer if you go this route, but remember that this is safe to under-bake!
- I used PEScience's Chocolate Truffle protein powder, which is one of my favorites. It's a whey/casein blend, so if you swap this out for another type of protein powder, I cannot promise the same results.
- The peanut butter in this recipe helps the texture tremendously and compliments the chocolate flavor really well without being overpowering. It can be swapped out for another type of nut butter or coconut oil, if needed.
- The almond flour in this recipe is a very small amount, so if you don't have any (or can't consume almonds) it can be omitted completely without affecting the final product much at all.
- I use a zero calorie sugar substitute, but since it's a 1:1 sugar replacement, regular brown sugar works great here too! If you go that route, each slice contains 220 calories with 12 grams of sugar.
- If you're saving this skillet for leftovers, I find that the texture holds up best when these are stored in the fridge. That being said, they keep just fine at room temperature.
Recommended Products
As an Amazon Associate and member of other affiliate programs, I earn from qualifying purchases.


Nutrition Information
Yield 8 Serving Size 1 SliceAmount Per Serving Calories 190Total Fat 11gCarbohydrates 11gFiber 3gSugar 3gProtein 12g
Did you use regular peanut butter or a drippy peanut butter (natural)? Thanks! I can’t wait to try this!
I use natural peanut butter which separates, but once it’s mixed up, either should work exactly the same!