High-Protein Soft Serve Ice Cream (With Just a Blender)
Update: Now that I have a Ninja Creami, I have included instructions on how to make this same recipe in the Creami as well.
There are countless recipes for protein ice cream on the internet, but the problem is, most of them just taste like glorified protein shakes in scoopable form.
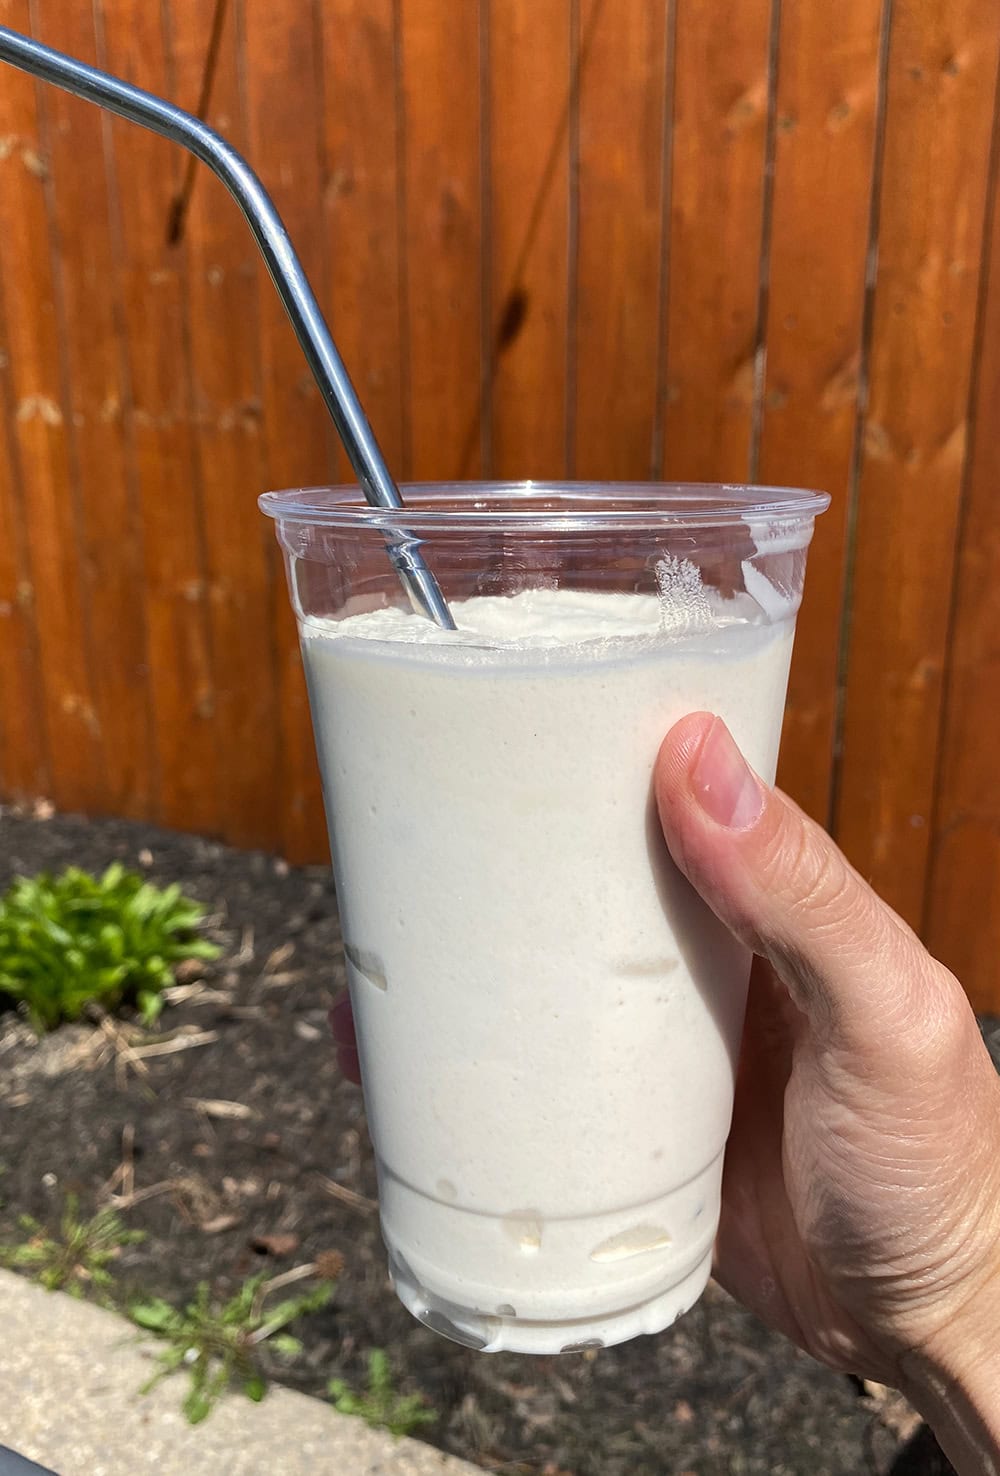
I wanted to create fluffy soft serve ice cream that was low in calories, high in protein, and had all the flavor we know and love in real ice cream.
And my friends… I’ve accomplished exactly that. Without an ice cream maker!
The ENTIRE batch of ice cream is only 300 calories with 0g of fat and 24g of protein!
That’s on par with any “protein” ice cream you’ll ever find, yet we don’t need any protein powder here.
Even better, you need just 3 main ingredients to make this magic happen:
- Evaporated Milk
- Powdered Sugar
- Vanilla Extract
We’re going to add a pinch of salt and an extra dash of milk, so if you want to get technical, it’s 5 ingredients in total. But those 3 ingredients are the backbone here.
I recently learned that you can whip evaporated milk into a whipped cream rather easily. Just combine it with some powdered sugar and whip it up with a hand mixer. I’ve seen people then freezing that to make ice cream, but when I tried that, it just froze into a complete rock. Not at all what I wanted.
It whipped up nicely initially, which got me thinking: what if I freeze the evaporated milk first, THEN throw it into a food processor to blend & whip it into ice cream?
I’ll admit, I did not expect it to turn out, but I think it’s safe to say that it came out beautifully.
If you only have a blender, that should work, but a good food processor changes everything. I’ve recently started using this Ninja food processor and it has changed everything for me. If you want a really smooth result, I highly recommend picking up a quality food processor!
UPDATE: YouTuber Will Tennyson actually gave this recipe a try in one of his videos, so if you want to see the recipe in action (and what he thinks of it), check that out below (it should start right at the right spot):

Ingredients Needed for Healthy Soft Serve Ice Cream
You’re going to be tempted to substitute ingredients, so I’m going to tell you exactly why I use each ingredient I used.
If you want the same result I got, I wouldn’t make substitutions. That being said, I did play around with 2 different dairy-free versions if you need dairy substitutions, so I’ll break those down for ya here.
But for the authentic vanilla soft serve, these are the ingredients we need…
Evaporated Milk
Milk in a can might be off-putting to some, but it is the absolute best ingredient to use here. It is NOT condensed milk.
They’re very similar, but condensed milk is going to have a ton more calories, so be careful. Both evaporated milk and condensed milk are milk that has had most of the water removed, resulting in a thicker, creamier product.
But the major difference is that sweetened condensed milk contains a ton of sugar and calories, and evaporated milk is unsweetened, containing only the sugars found in milk.
You CAN buy evaporated milk with fat, but I went with the fat-free variety for this recipe:

The whole can is 300 calories, and those are the only calories contributing to our ice cream.
Reduced-fat evaporated milk will also work great here. If you go that route, the entire can is 360 calories, so not a huge difference.
Powdered Sugar Substitute
When it comes to ice cream, you generally need to use more sugar than you think. I tried countless times to reduce the amount, but the final result was always lacking flavor.
I used powdered sugar substitute to keep the calories low, but you can use regular powdered sugar here if you prefer.
If you don’t have any powdered sugar at all, make your own! You can throw any granulated sugar into a spice grinder or food processor to make your own super easily.
Vanilla Extract
For years, I’ve been using imitation vanilla extract. It’s significantly cheaper and you can buy a much bigger bottle. It always works in my recipes, but for this one, REAL vanilla extract makes a huge, huge difference. I cannot overstate it!
If you want an authentic ice cream flavor, a good vanilla extract is an absolute must. If you only have imitation vanilla and want to give it a try, you definitely can, but that authentic flavor is going to come from a good vanilla extract.

Throw in a pinch of salt, and you’re good to go! I’ve tried other ice cream recipes in the past that require you to make a mixture, add to the freezer, mix it up again, add it to the freezer again, and continue repeating until you have the consistency you want.
I don’t know about you, but I’m not trying to spend all day making ice cream. Instead, this recipe is just prep, wait, and make! You just make the mixture, let it completely freeze, then blend it up. Easy as that!
How to Make High-Protein Soft Serve Ice Cream
The process for making this soft-serve ice cream is very simple, but let’s walk through it together.
Step 1: Mix together the milk, vanilla extract, powdered sugar, and a pinch of salt. Give it a quick whisk to mix everything well.

Step 2: Pour your mixture into a large freezer bag and seal it tight without any air, then let it fully freeze (it will take about 8-10 hours, so I recommend leaving it overnight to make it easy). I like this method because it makes it super easy to break up the frozen mixture rather than trying to blend a large frozen block. An ice cream tray will also work great here.

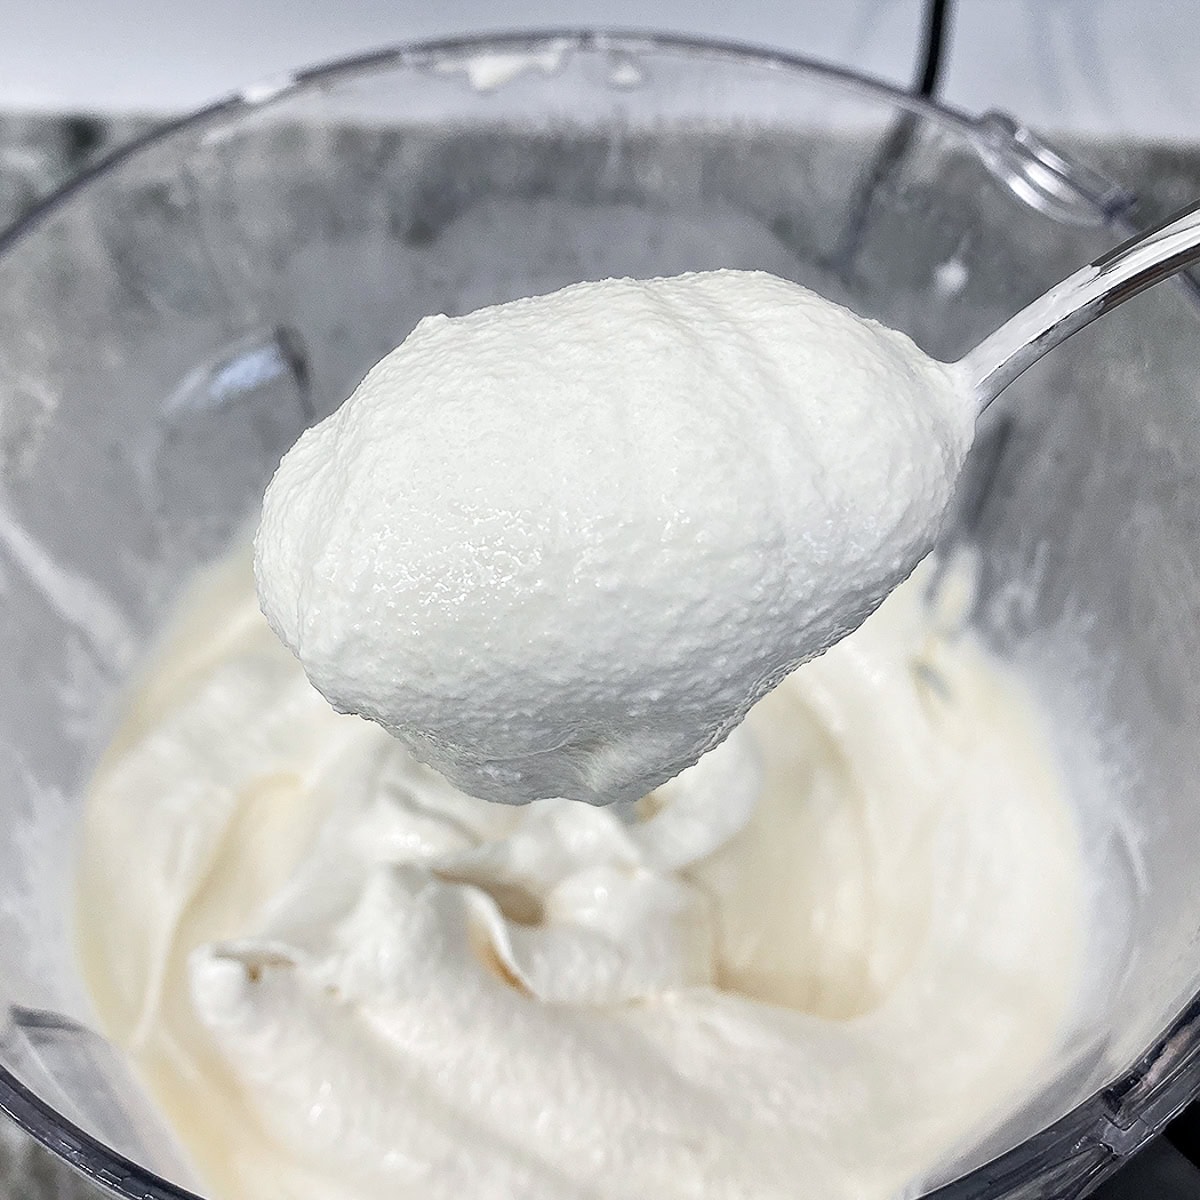
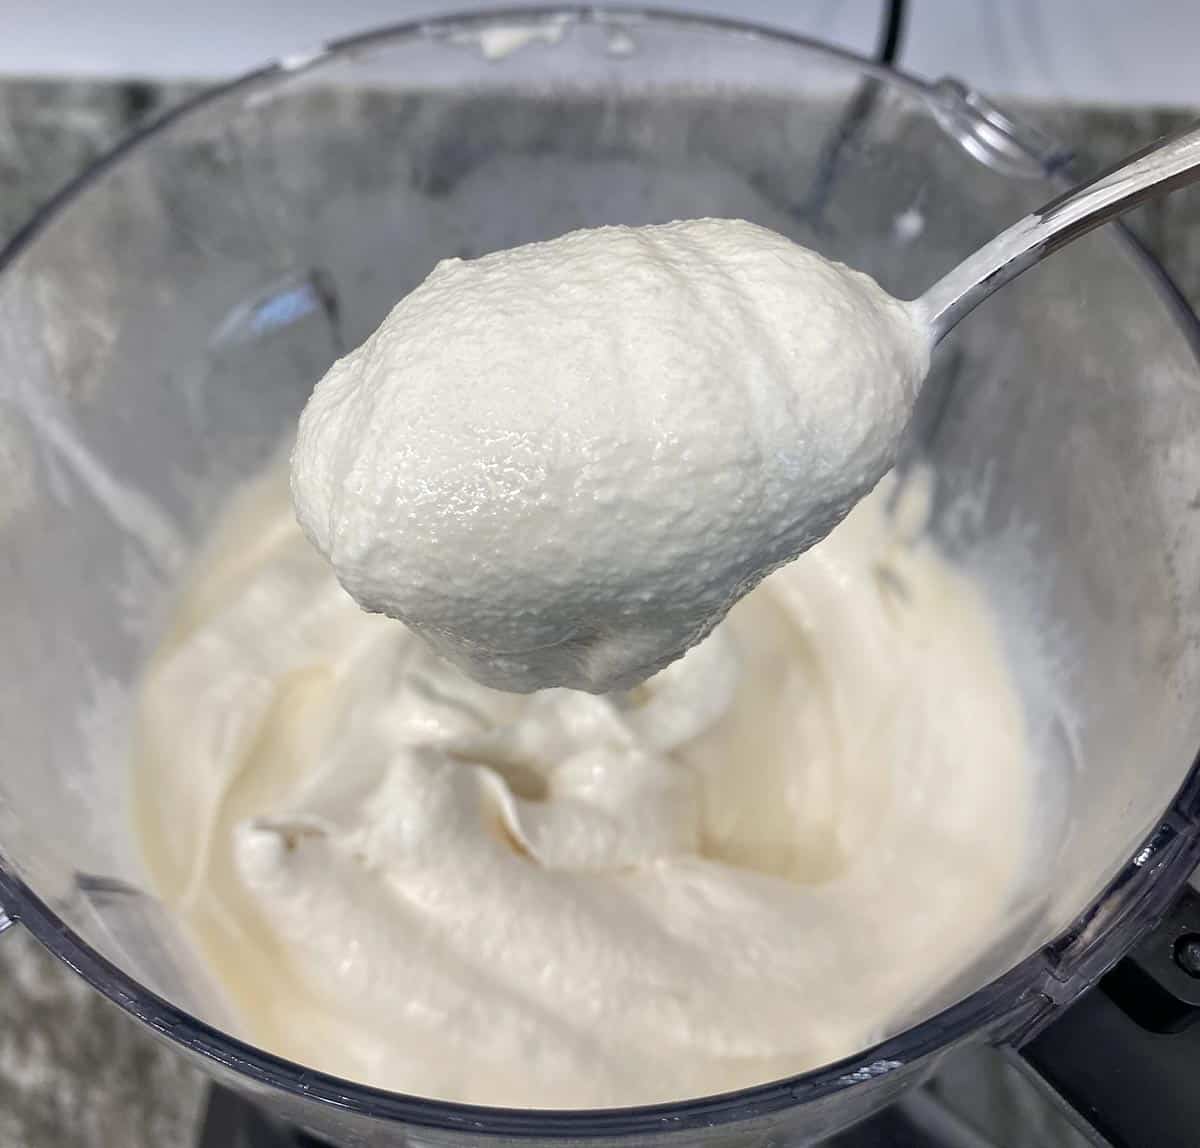
Step 3: Add the pieces of the frozen mixture to the food processor and let it run for about 30 seconds. It’s going to be crumbly and not quite ice cream… yet!

Step 4: Add 1-2 tablespoons of milk (any milk will do just fine) to the food processor and run it on high until everything blends up into smooth, fluffy ice cream!
When I first made this ice cream and saw that it made some weird, Dippin Dots-style ice cream, I was ready to dismiss this as a failed experiment. But out of curiosity, I added a tablespoon of milk, and slowly watched as the yellow pebbles blended up into smooth, white, vanilla ice cream.
Can you store this healthy soft-serve ice cream in the freezer?
I love , so I dove into the just as is.
But as an experiment, I froze some of it to see if we could get some out of it.
The best way to re-freeze the is in a container that you can tightly cover. Air is the enemy of , and it will turn your into a rock if you’re not careful.
I used plastic wrap to keep it tightly wrapped, and it worked pretty well. It hardened, but if you leave it out for a minute or two, it softens up enough to eat. If you’ve ever had a pint of “protein “, it becomes a similar consistency.
The longer the freezes, the harder it’s going to be. If you were to leave it in the freezer for another full day, you’d be left with very . Since this is fat-free, there is nothing to keep that that we like.

If you do want to freeze the ice cream to thicken it up, 2-3 hours in the freezer should do the trick.
In fact, that is what I did for my Pumpkin Pie Ice Cream recipe. Once blended, I added it back to the freezer for about 2 hours, and the result was perfectly scoopable…

How to make Dairy-Free Soft Serve Ice Cream
I tried two different dairy-free options, and I’ll add my favorite to the recipe card down below.
But I want to show you what I chose to use, and how the end result turned out…
Option 1: Lite Coconut Milk

You could use regular coconut milk if you prefer, but the calories and fat will be much higher. Now, keep in mind that coconut milk has no protein, so there’s not going to be any protein in your ice cream. But that’s fine- just get your protein in elsewhere!
When all is said and done, this ice cream weighs in at only 240 calories and 0g of sugar for the whole batch! Not too shabby if you ask me.
Follow the same exact directions as the regular soft serve ice cream, but when it comes to blending, you’re going to need an extra tablespoon of milk at the end to thin it out. The result is not quite soft serve ice cream, but still soft and creamy.
Somewhere in between soft serve and scoopable ice cream, I’d say.
Honestly, much better than I expected, especially for dairy-free ice cream!

I added some Oreos to the food processor in this one to spice it up, but obviously, that is optional.
While this isn’t quite the same soft serve, it was still quite good! I mean, I ate the entire batch and enjoyed it, so it couldn’t have been terrible.
Update: I went back and used this method to make my Dairy-Free Peanut Butter Cup Blizzard.
Option 2: Protein Silk

Can you use regular almond milk without any added protein? Probably, but I wasn’t willing to try.
The issue with nut milk is that they are very much water-based. Remember, we use evaporated milk in the original recipe due to the low water content, so using nut milk changes things up quite a bit.
I chose to go with this one because it’s creamier than typical almond milk, and obviously contains protein! This batch of ice cream ended up being 195 calories and 15g protein- not bad at all!
Much like the coconut milk version, this required a little bit more liquid. When it came to blending, I needed to add an extra 1/4 cup of milk to thin it out. Due to the high water content, this froze very solid and became almost like ice.
The result was definitely icier and not quite as creamy as the others, but the flavor was definitely there.

I’m not going to add this particular version to the recipe card, but you can follow the recipe exactly as-is and just swap out the milk you’d like! I used 1.5 cups of Silk Protein, which is 12oz of liquid.
You can certainly try any other milk you have- even oat milk might work well here! But if you want true ice cream, evaporated milk is definitely the way to go. If you need to do dairy-free, coconut milk was by far my preferred milk to use.
How to turn this into chocolate soft serve
Vanilla ice cream is far superior to chocolate ice cream as far as I’m concerned, but I cannot deny the popularity of chocolate ice cream.
To turn this into chocolate ice cream, it’s actually very easy!
Follow the same exact recipe and add the mixture to the freezer overnight.
The difference will come when blending: instead of adding a splash of milk to thin out the ice cream in the blender, we’re going to use chocolate syrup instead.

I used this lite syrup, but any chocolate syrup will work great.
Since I didn’t measure, I estimate that I used roughly 2 tablespoons of chocolate syrup for this (which will add 60 calories in this case). I started with only about one tablespoon, but had to add more as I didn’t find it to be enough.
The resulting ice cream tasted JUST like a chocolate/vanilla swirl!

To me, this was the perfect chocolate soft serve ice cream.
But, if you want a richer chocolate flavor, you can add cocoa powder to your initial mixture, which will give this ice cream much more of a deep chocolate flavor.
You can check out my Chocolate Peanut Butter Blizzard recipe to see the perfect cocoa powder measurements to use.

How to make this recipe in the Ninja Creami
When I first formulated this recipe, the Ninja Creami was not an option. Since then, it seems that everyone owns a Creami (myself included), so that has replaced the blender in my own protein ice cream creations.

It turns out that this same exact recipe can be used in the Ninja Creami to achieve delicious, fluffy soft serve ice cream.
I spent weeks experimenting with the Creami to be able to provide you guys with all the tips & tricks for perfect protein ice cream using that handy little gadget, so here they are:
View this post on Instagram

High-Protein Soft Serve Ice Cream
As a lover of soft serve ice cream, I never expected this healthier version to even come close to the real thing, but I'm telling you, this is as good as any soft serve ice cream you've had!
Ingredients
Ingredients for Original Recipe (No Protein Powder)
- 12oz (1 Small Can) Fat Free Evaporated Milk
- 50g Powdered Sugar Substitute (or regular sugar)
- 2 tsp Vanilla Extract
- 1 Pinch Salt
- 1 Tbsp Milk of Choice (any milk will work)
Ingredients for Higher-Protein Recipe (With Protein Powder)
- 12oz (1 Small Can) Fat Free Evaporated Milk
- 15g (1/2 Scoop) Vanilla Protein Powder
- 2 tsp Vanilla Extract
- 5g Sugar-Free Pudding Mix (any flavor)
- Extra Splash of Milk
Ingredients for Dairy-Free Version
- 13.5oz (1 Small Can) Lite Coconut Milk
- 50g Powdered Sugar Substitute
- 2 tsp Vanilla Extract
- 1 Pinch Salt
- 2 Tbsp Milk of your choice (any milk will work)
Instructions
Blender Instructions
- In a bowl, whisk together all of your ingredients, minus the extra tablespoon(s) of milk.
- Pour your mixture into a large sealable freezer bag and make sure to remove all of the air. Using this method makes it very easy to break the mixture up and add it to the food processor once frozen, but you can also use an ice cube tray if you prefer.
- Lay the bag flat in the freezer (if the bag is standing upright, it will all freeze into a block at the bottom of the bag) and let fully freeze, about 8-10 hours. I highly recommend just freezing it overnight to be safe. I made one version without the mixture fully frozen (it was still pretty soft) and the final ice cream was way too liquidy. Be sure you let your mixture fully freeze!
- Once frozen, break the frozen mixture up (either with your hands or by banging on the counter) and add the pieces into the food processor or blender.
- Blend on high for about 30 seconds or so, until everything blends up into a mixture that looks like pebbles (see photos above).
- Add roughly one tablespoon of milk (2 tablespoons if making the dairy-free version) and use a silicone spatula to scrape the edges to make sure everything will blend together and isn’t just stuck to the perimeter. This doesn't need to be the same can of milk we used for the mixture- any milk will do just fine.
- Run the food processor on high, and let it do its thing for another minute or two until it becomes fluffy soft serve.
Ninja Creami Instructions
- Add all of your ingredients to your Creami pint and mix together with a whisk or frother. Freeze overnight.
- Run the frozen pint under hot water for about 30 seconds to loosen up the sides.
- Run the Creami on "lite ice cream"
- Remove the pint, scrape down the sides with a spoon to make sure everything gets blended evenly, and add a splash of milk (a little goes a long way).
- Add back to the Creami for 2 respins. Use only 1 respin if you want thicker ice cream, and 2 respins if you want fluffy soft serve.
Notes
- The higher-protein version contains 375 calories & 36g protein per batch.
- Prefer chocolate? Instead of adding milk to thin out the ice cream, add chocolate syrup! I added roughly 1/4 cup of chocolate syrup and the result tasted just like a vanilla chocolate swirl.
- This ice cream is best served right away- if you freeze any leftovers, they will freeze completely solid. If that's the case, you can leave it out at room temperature to thaw until soft enough to eat, but you won't have the same soft-serve consistency.
- Note that I do not count sugar substitute in my carb totals because they contribute 0 calories.
Recommended Products
As an Amazon Associate and member of other affiliate programs, I earn from qualifying purchases.


Nutrition Information
Yield 1 Batch Serving Size Entire Batch (Dairy Version)Amount Per Serving Calories 300Total Fat 0gCarbohydrates 36gProtein 24g
I love this recipe, and it fills a gap in my life. I love ice cream and healthy versions (especially store bought) are just so unsatisfying. This is easy, has uncomplicated ingredients (that are easy to find! no weird one off ingredients like guar or xantham) and it tastes amazing. Definitely my new favorite recipe. I’ve made it every day for the last four days. Without guilt.
Just made this… delicious! Have you tried churning it in an ice cream machine, so you don’t have to freeze it overnight? It would be great to be able to make it on the spot! Thanks!
@Laura, I used an ice cream machine (a little cheap one) and it was delicious
So good!! Threw a few Oreos in there and geeze…it was delicious, so easy, and much better than the overpriced low cal options. Will always have a bag in the freezer ready to whip up. Thanks for sharing your recipes, Matt!!
One of the best recipes here. Combination of easy and taste makes this one of the top ones on the site. Great summer treat.
This recipe is so clutch when I’m craving something sweet. It truly is the perfect consistency and taste! I went the route of freezing it in an ice cube tray and I wish I hadn’t. I’d only recommend if you have a silicone tray!
Typically a very small amount of Karo syrup keeps no fat or no churn ice cream from getting too hard or icy. I used 1.5 teaspoons. That amount is a minuscule amount.
How did it work out for you in this recipe? I’d love to give that a try if it works well!
This looks great but 50g of Splenda seems like a lot and according to Google, this is around 160 calories not zero. 50g would be 50 packets. Is that really how much sweetener is in this?
Hey Elita, thanks for the comment. I don’t use Splenda, I use a different sugar substitute. Personally, I don’t like the taste of Splenda. 50g is roughly equal to 1/4 cup, so even if you used regular sugar, that would add roughly 200 calories. I’m not sure what the source of the Google search was, but the equal amount of Splenda would not be 160 calories. Splenda does contain trace amounts of calories, but should not be nearly that high, although I don’t know too much about Splenda specifically. For the record, I use erythritol in my recipes, which contains about 0.2 calories per gram. So in total, 50g would only add about 10 calories to a recipe if you chose to count them. Hope that helps!
@Matt,
Thanks for your reply. I’ve never used Erythritol but will look for it at the store.
Sucralose is calorie-free, but Splenda also contains the carbohydrates dextrose and maltodextrin, which brings the calorie content up to 3.36 calories per gram. If you’re only using a packet or two in your coffee, the result is pretty negligible. But when using 50g you’d definitely be adding a decent amount of calories. I’ll play around with it if I can’t find the Erythritol.
@Matt, thanks for the great recipe. I’m wondering if the 50 g of sugar free powdered sugar is right (I used Swerve). Package says 3 gm is 1 teaspoon, so I’d be adding about 17 teaspoons of this! I did as the instructions said, and it’s crazy sweet as expected, and it now adds a lot more carbs since it’s such a high volume of artificial sweetener. In your video, it looks like you just added about a spoonful. Is the recipe correct? Thanks.
Hey Sheri- in the video recipe you saw I had to edit it down so you only saw one spoonful, but 50g is correct! It should not taste overly sweet, but you can definitely scale it back if you prefer. Texturally, the ice cream will still turn out great, even if you cut it in half, but the 50g was the right balance of sweetness for me personally.
Hi Matt! Will you share a reel of the silk one ?
Awesome and thorough explanation. I really appreciate you did experiments for us, saving your audience some time. Nice work!
Happy to help 🙂
Wow! Finally made this. Bought the Evaporated milk forever ago. Thank you for making something that is not ‘protein fluff’. Belly ache not worth it and the few times I have made it , the taste it just not worth it either.
But this. Holy cow. Amazing
It does make a lot though. My processor showed 4 cups. I think next time I’ll try only blending half of the frozen mixture. And saving the other half for another time.
Also I used .5 cup of the cheap powdered stevia from aldi. I’ll probably use a little less next time. Because there will definitely be a next time.
Something that you can mix up and keep the frozen mixture in your freezer for when that ice cream craving hits.
Well done on a other great recipe. You haven’t failed me yet.
This is so delicious. I made my most recent batch with Nature’s Charm evaporated coconut milk. After freezing the mixture overnight in a ziploc bag that was probably too small, I had to let the bag sit on the counter for about 20 min to soften a bit. Then I emptied the block into a bowl and broke it up with a knife (it was easy) before putting it in the food processor. I also had made this recipe with regular evaporated milk, and both tasted the same, and both were wonderful. I’m just lactose intolerant, so I’m hoping the evaporated coconut milk doesn’t affect me like the regular evaporated milk did. I topped with Ben and Jerry’s cookie dough bites from the ice cream section (they sell frozen edible cookie dough pieces in little bags). Thanks for the super easy and delicious recipe!
Can you add any protein powder to this or does it screw up the consistency?
This came out amazing. So delicious and I tried the oreo kind too. A couple of tips: get silicone ice cube trays with lids on Amazon. You can get 4 of them for under $10. This makes freezing and getting the frozen mixture out so much easier. I’m going to try to expand this recipe by including a tray of frozen half and half cubes. I also am going to use chocolate animal crackers instead of oreos to save on calories since the choco animal crackers from Dollar street taste like the chocolate cookie part of the oreo. Thanks for this recipe!
Can I use half milk and half evaporated milk to make it even lower in calories?
Trying this tonight!
Let me know how it treats you!
Thank you so much! Glad you enjoyed this one 🙂
Thank you!! I agree, sometimes the banana flavor is just too strong, so I love this variation instead.
Great suggestion!! The ice cream does melt fast, which is the only major downside here. I always eat it right out of the food processor since it’s already nice and cold in there, and it tends to melt when transferred to a bowl, but I like your idea!
I had my dad try this and he said it was incredibly good. Literally just like the real thing with 1/3 of the calories
Dad-Approved is almost as exciting as kid-approved. I’ll take it!
WIll it be too icy without the powdered sugar alternative? I’d prefer to use pure stevia.
Hi! A few questions: 1) Are the nutritional stats for the dairy-free version or the dairy version? 2) Is there any way to lower the carbs? 3) Would pure stevia work?
THanks!
Thanks for asking!
1) Nutrition is for the dairy version, I’ll make sure to note that! If you use the dairy free version, you only need to take the nutrition for the can of the coconut milk you use, since the other ingredients do not add any calories.
2) The carbs come from the milk (since it naturally has sugar), so the dairy free version will make it virtually carb-less! Using coconut milk takes the protein out of it, but also the carbs.
3) Stevia should work just fine- any sweetener should work for the flavor. A powdered sugar is your best bet because it mixes in the easiest and it helps to create that smooth consistency, but using stevia should not be detrimental
Hi! Is there any way to remove my review? I tried to click on the reviews to hopefully read them, but it added a 3 star review instead. I haven’t tried the recipe yet and don’t want my review to bring the rating down.
No problem Amanda, don’t worry about it! Nobody left a written review here, but I can assure you the recipe got great feedback on social media :]